
 Posted in
  Tags:
Tags: Source: MDXers
REARS: These are so easy that they were done before I even took out a camera! Just jack up whatever side you’re changing, undo the two bolts and swap the unit out. You COULD do it with the wheel on, but it’s much easier with it off. My MDX has 135k on it, and the lower end didn’t want to come off the stud. I just used a cold chisle as a drift and broke them free. Easy peasy! Torque spec is 47 ft-lb.
Fronts: This is more involved and give yourself a bit of time. While it’s exactly the same as on my MINI, the parts are bigger and heavier for sure!
Tools Required
10 mm socket
12 mm socket
14 mm deep socket (Torque Spec = 43 ft-lb)
6″ extension
Magnetic retriever
17 mm box end wrench (Torque Spec = 58 ft-lb)
5.5 mm Allen wrench
22 mm socket (two of them) (Torque Spec = 116 ft-lb)
4″-6″ extension
1/2″ drive breaker bar and rachet (for the pinch bolts)
Floor jack
Jack Stands
1) Jack up both sides of the front end, and take off the wheels. You need to jack up both sides to unload the front anti-sway bar.
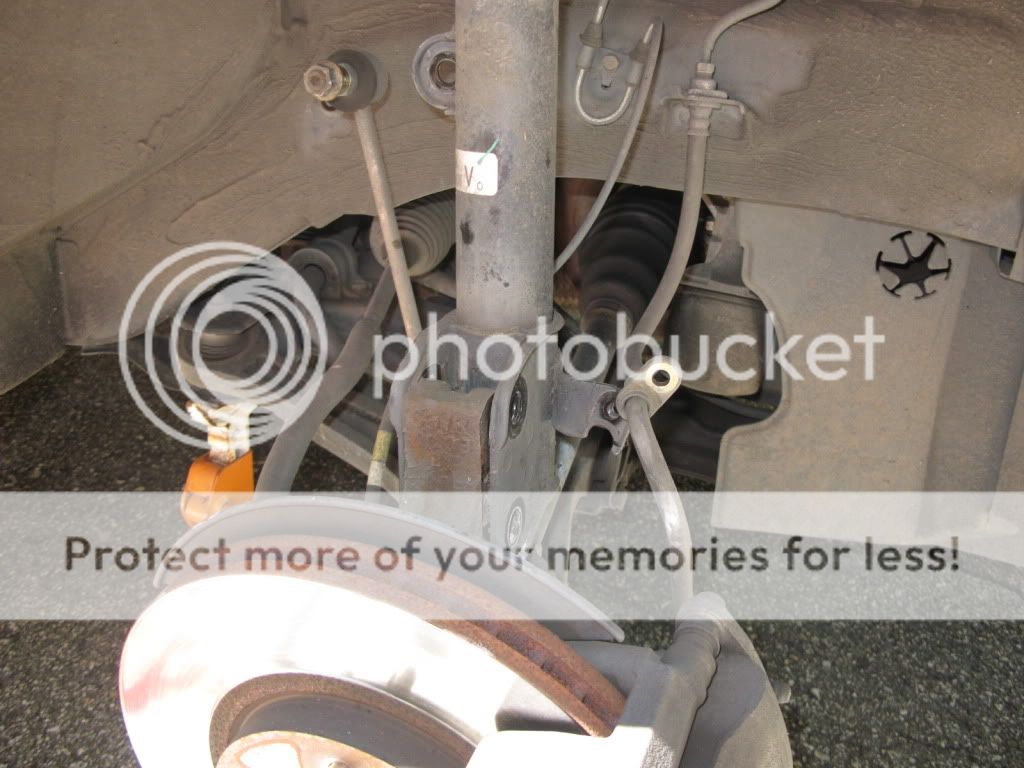
2) Undo the sway bar end-link from the strut (17 mm wrench or socket, 5.5 mm allen. I didn’t need to use the allen) and push out of the way.
3) Undo the brake line guide from the strut (12 mm wrench or socket).
4) Undo the wheel speed sensor guide from the strut (10 mm wrench or socket).
5) Place a support under the disc (I always do this when I remove struts, but the MDX doesn’t really seem to need this, it’s just a habit) and remove the two pinch bolts. 22 mm sockets and BIG breaker bars. This will free up the steering knuckle and the strut will only now be held on by the three bolts that are up top.
| This image has been resized. Click this bar to view the full image. |
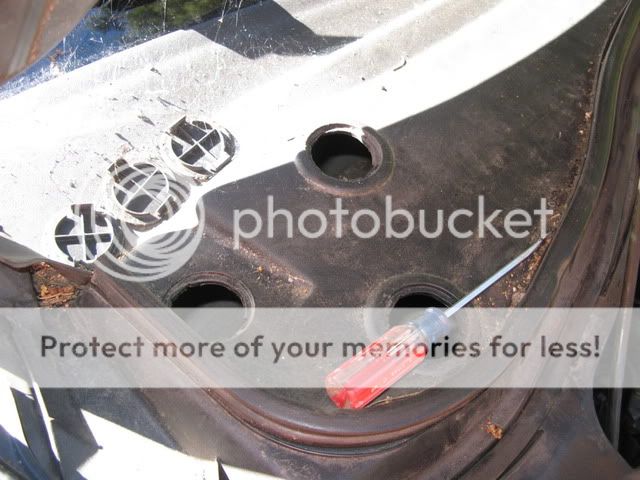
6) Open the hood and use a small flatbladed screwdriver to pop off the little plastic nut covers.
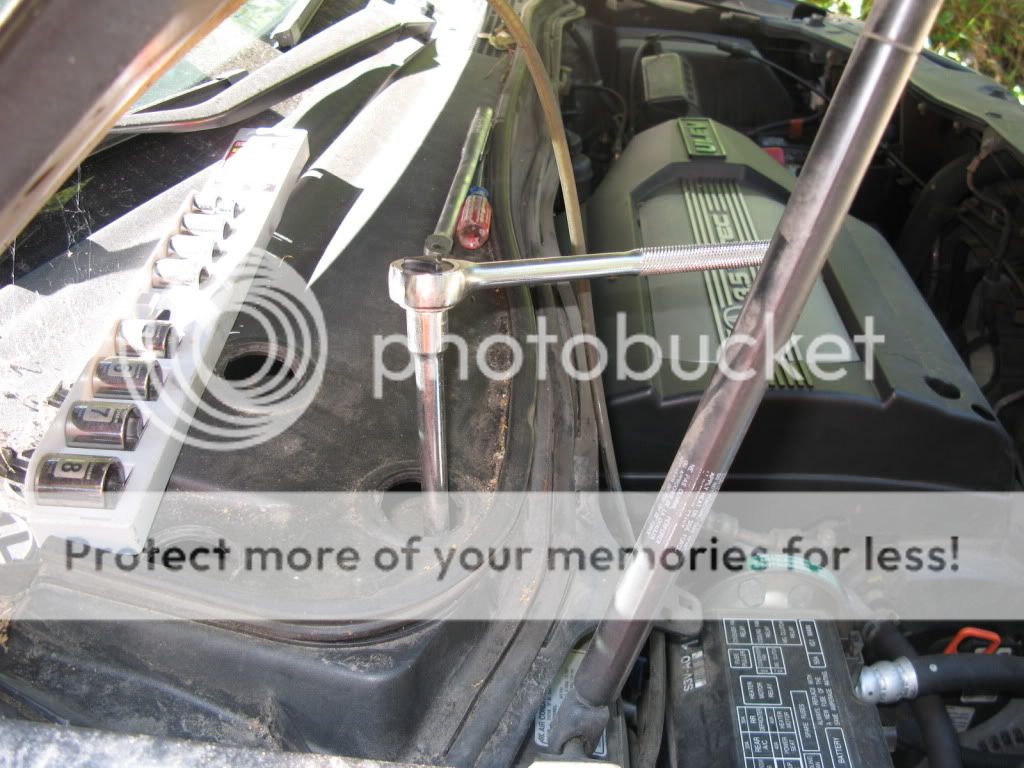
7) Use a 14 mm socket with a 6″+ extension to loosen and remove the three nuts. The strut won’t fall out, but if you’re risk averse, it’s good to have a helper here. Here’s a big hint though, the threaded parts of the strut guides are pretty long, so you may need to use a deep socket to really grab the nut. If you don’t have one, you can use a normal socket, just don’t put it all the way onto the extension and you have enough of the socket on the nut to break it free. You may need a magnetic gizmo to get the nuts out. I did.
| This image has been resized. Click this bar to view the full image. |
8) Wrestle the sucker out of there. I found it easiest to lower it a bit till I could get the top clear of the fender, then lift it up clear of all the wires and the like.
Now you have two choices. You can take it to a shop to move the springs over, or you can get a spring compressor and do it yourself. The springs on the MDX are a lot bigger than what my spring compressor is good for, so I took them to a shop. It was $61 and change to get them done. This also wasn’t the cheapest shop. This was purely a choice of convienience, as I do the springs on my Mini all the time.
Installation is the reverse of the above. I do have one much needed hint. The three threaded studs on the strut guide are not symmetric! Two of the spaces between the three are a bit less than 4 1/2 inches, and one is a bit longer than 4 1/2 inch! You need to allign this span perpendicular to the car! It goes to the back. If you don’t do this, you’ll have to take the strut out when you can only get one bolt in (don’t ask me how I know!)
As you wrestle the strut up into the wheel well, you can get it onto the steering knuckle pretty easily (yes, this is a relative comparison). Place a floor jack under the control arm to lift up the strut. If the studs on the strut guide are not alligned with the holes, you can use the steering to fine tune it. But make sure that you get the plate alignement close before you start lifting, as you don’t have tons of range of adjustment with the steering.
| This image has been resized. Click this bar to view the full image. |

| This image has been resized. Click this bar to view the full image. |

I went with the KYBs, bought RIGHT BEFORE the Monroes dropped in price! I also used new strut guides as well. Reused the upper spring perches and springs. Total cost including the labor for the springs was about $320.
Overall the car handles much, much better. MOST (but not all) of the thunks are gone. I did my standard test (had my wife drive it) and she didn’t really notice that much difference, but she’s not a car nut. Also, both of my fronts were leaking. the remaining thunk seems to be from the passenger side anti-sway bar bush and I’ll be doing that shortly.