
 Posted in
  Tags:
Tags: Since there is no formal guide other than the one in the service manual, I decided to document the replacement of my 3rd and 4th gear pressure switches.
For the record, my transmission has about 35,xxx miles at the time and I am the first owner. The shift quality is decent, I haven’t noticed anything unusual other than 3rd gear holding on steep inclines under load. I just recently did a 1×1 drain/refill of the transmission fluid at an Acura dealer as well (about 1K miles ago prior).
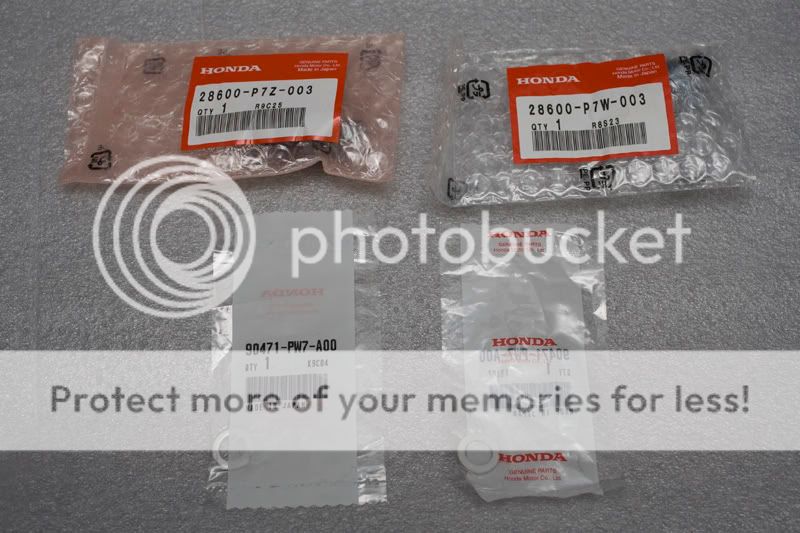
Materials needed:
x1 3rd Gear Pressure Switch (28600-P7Z-003)
x1 4th Gear Pressure Switch (28600-P7W-003)
x2 sealing gasket (90471-PW7-A00)
x1 brake cleaner (to wash away residual AT fluid)
Tools required:
10mm wrench
22mm wrench
flathead screwdriver
lift (or jackstands)
On to the pictures.

I brought my car to my friend’s shop (where he did the Accord foglight install). the car was raised and immediately, you will have access to one of the switches. You first undo the two 10mm bolts that hold a shroud, and then unplug the two connectors just so that you can swing the shroud out of the way:
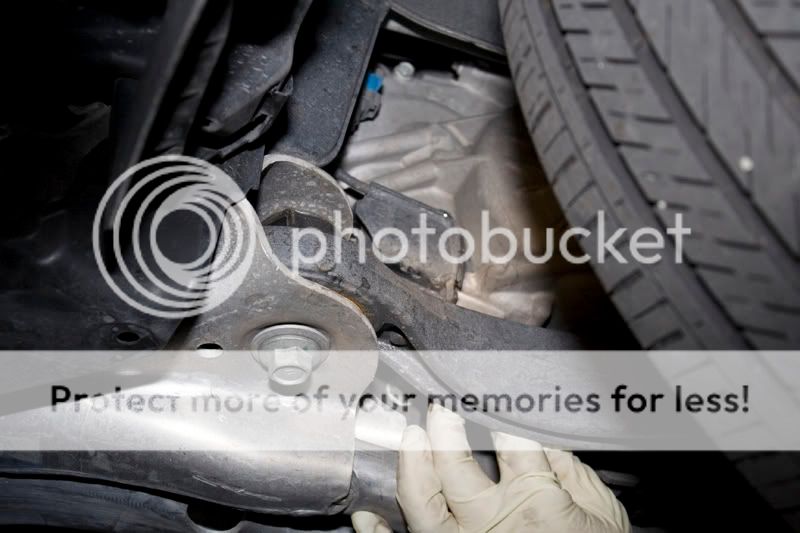
to see which bolts im talking about, see this pic from e30cabrio

that open hole in the middle of the pic is for one of the bolts. the TL has two holding that shroud.
the other switch is visible once you remove part of the splash cover along the inner fenderwall. this is what you should see:
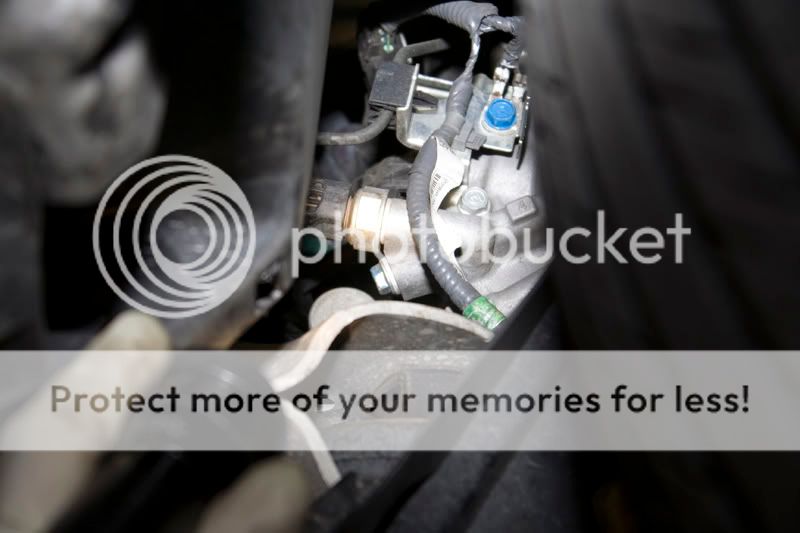
You will need a 22mm wrench to unscrew each switch from their location. once you got them loose, unscrew by hand. unplug the connectors as you go and reconnect them once you put everything back. I suggest doing one sensor at a time.

Now for the details.
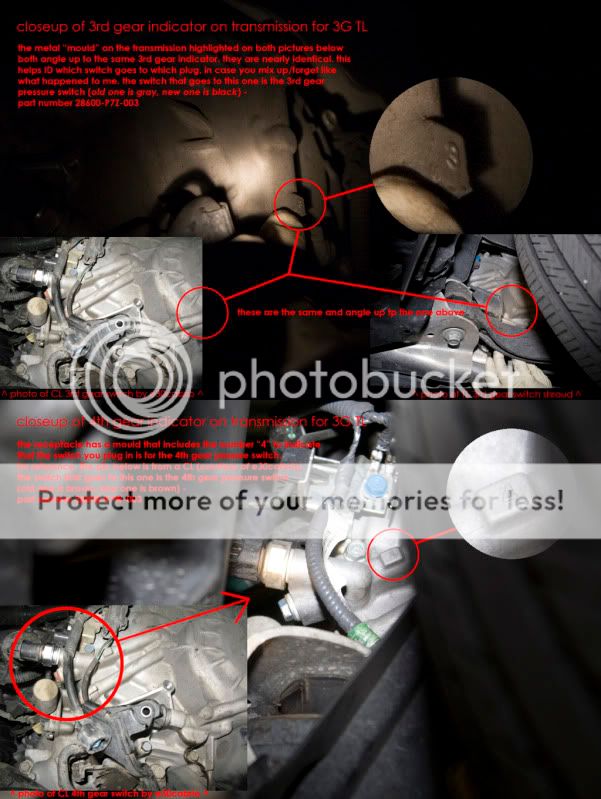
I noticed that the transmission housing has moulds on it that actually tell you which is which. Now, those who may know which switch is which may have no problem, but in the event you forgot (like me), one way to determine which goes where is by looking for these indicators, see below:
The amount of fluid that drips out is not much, but to get a sense what to expect, I took a shot:

You will need to use the brake cleaner to remove the residue of the AT fluid on the parts of the suspension. depending on how much got out and where, you can just spray liberally:

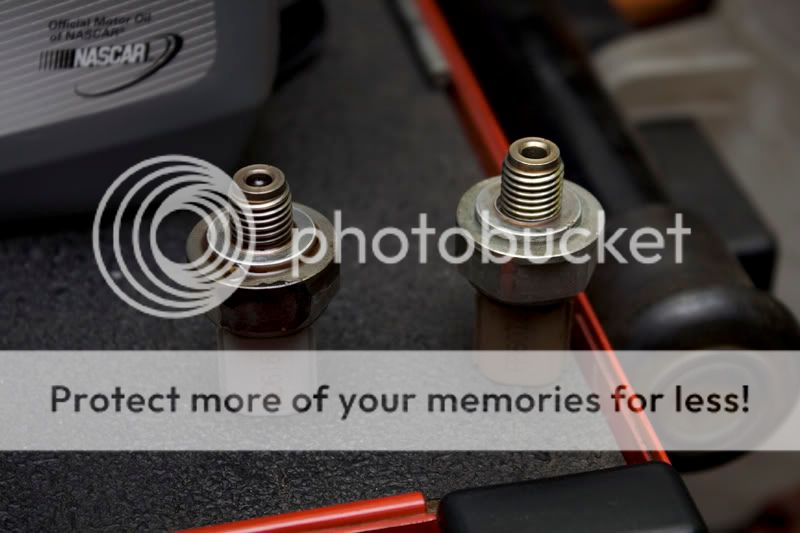
Finally a pic of the switches I replaced. 3rd gear on the left, 4th gear on the right.
Driving Impressions
Immediately after having these put in, I did notice an improvement of the car’s shifting habits. I can’t really quantify it much, but the shift from 2nd to 3rd and 3rd to 4th now happen much quicker. Put it in another way, they arent as “sloppy” as before. Even after applying load and a couple of WOTs, they are just noticeably different. Frankly it feels like Im driving a brand new car.
I would definitely recommend this as a Preventive Maintenance item. I likely will do it in around 70K miles just to keep the 35K mile mark I set. for the low cost and ease (even though I personally didnt do it), I think it is a worthwhile investment, along with doing the drain/refill procedure for the 3G TL AT transmission.
thanks to I hate cars for starting the transmission thread and credit goes to those that provided the part numbers as well as e30cabrio for one of his reference pics.