
 Posted in
  Tags:
Tags: Source: AudiPages
Replacing Rear Pads and Rotors
By Paul Waterloo
Replacement of rear rotors and pads is an easy task, even if you’ve never done it before. Consider replacing both if your rotors have 50,000 miles or more on them. This will prevent you from having to do the job again anytime soon. Plus, you don’t have to get the rotors turned, which can be a real hassle if it is not done correctly or you don’t have two vehicles.
If the rear brake pads are worn down, the fronts are probably not far behind. Check them while doing the rears. The rears DO NOT have wear sensors. When the brake pad backing plate comes in contact with the rotor and metal to metal contact is heard, you will know it’s time to do the rears!
All A8’s and S8’s had the same rear brakes. This procedure is applicable to all models.
Special Tools Required
- 8 mm Allen wrench to fit to a 3/8″ rachet drive (only needed if replacing rotors)
- Large C-clamp to push the piston back in the caliper
- Channel locks or Harbor Freight tool to push the piston back in the caliper
- Metric sockets
- 15 mm open ended wrench
- Caliper lube
- Brake cleaner and rags
Brake Components
The following picture is from the Bently manual. It identifies the major brake components.
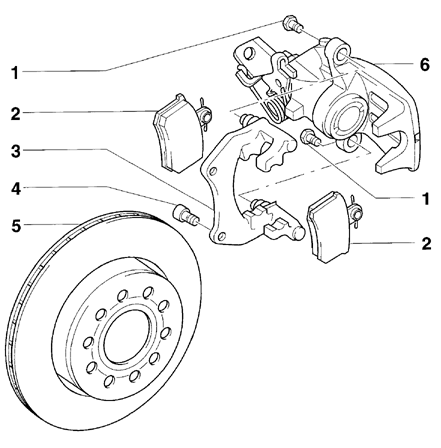
Figure 1
Procedure
Take lug nut caps off and loosen lug nuts. Jack the car up and put the rear end up on jack stands. Raising the entire rear end makes the job much simpler and safer. Remove wheel.
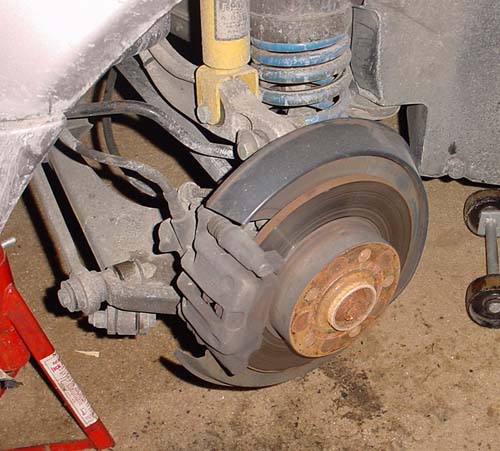
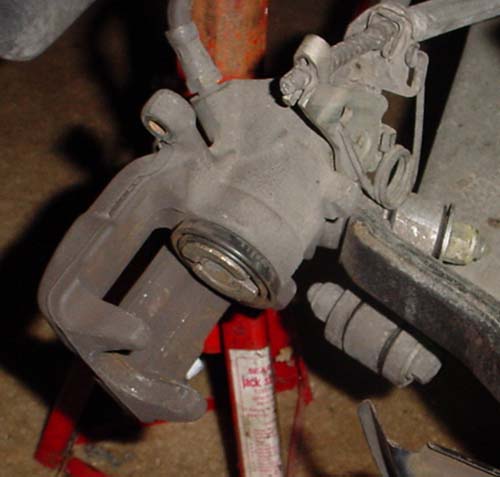
A8 Rear Brake Assembly.
Using a 15 mm open ended wrench, hold the nut shown in the picture below (part of Item 3, Figure 1). Using a 13 mm socket or wrench, loosen the bolt just inboard of it (Figure 1, item 1). Repeat for second bolt assembly.
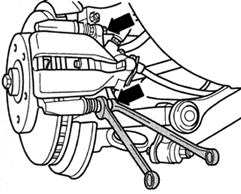

Use a 15 mm open end wrench to hold the nut from spinning while loosening the bolt just inboard of it. The top bolt has already been unscrewed.
Remove caliper assembly by lifting it up and off. Have wire ready to tie it up or rest it on the suspension arm. Do not allow it to hang from the brake line!
If removing rotors to replace them or to have them turned, remove the two carrier retaining bolts (Figure 1, Item 4) using an 8mm allen head socket. Remove carrier.
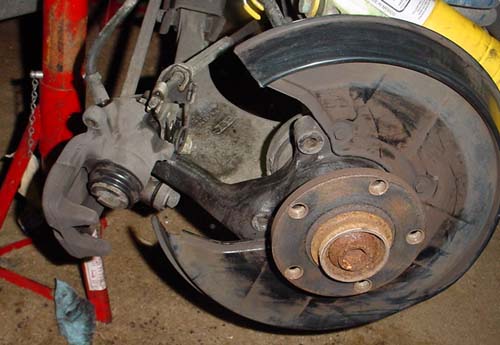
Rear caliper and rotor removed. Piston has not been pushed back in cylinder yet.
There are several ways to get the piston back in the caliper. It must be screwed in using a clockwise motion with pressure on the piston. This can be accomplished by using a large C-clamp and channel lock pliers or by buying the caliper tool set for disc brakes from Harbor Freight Tool Company. This tool not only provides the pushing force, but also screws the piston back in at the same time.
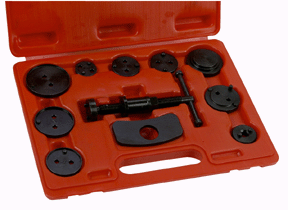
Caliper tool set from Harbor Freight Tools.
Part number 40732. This makes the job really easy!
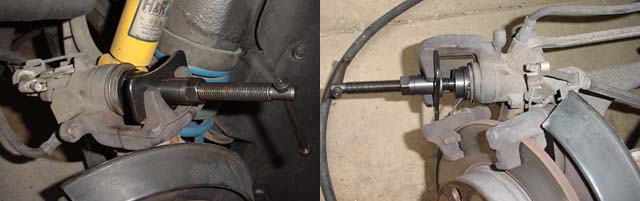
Using the Harbor Freight tool is the easiest way to get the piston back into the caliper. You won’t damage the piston boot with this tool. It pushes and turns the piston back in.
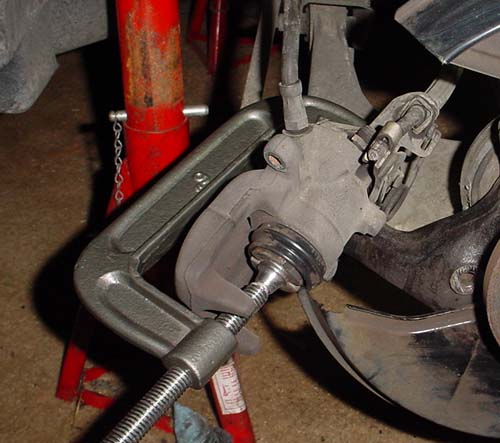
Using a large C-clamp, place slight pressure on the piston.
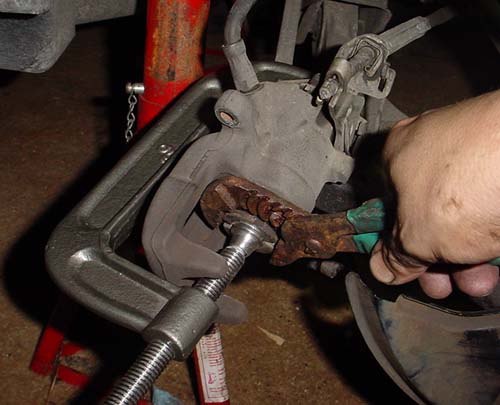
With pressure on the piston from the C-clamp, use channel locks and screw the piston in using a clockwise motion. Ensure the piston rubber boot is not caught up in the channel locks. This can cause it to tear and then you will need a new caliper sooner or later due to piston becoming contaminated.
Turn the piston in about 1/2 turn, then readjust the C-clamp to apply pressure again. Each time the piston is screwed in, the C-clamp must be tightened. It’s a real pain to do. With the Harbor Freight tool, it’s a breeze. If you plan on doing the rears more than once, it would be a good investment. If using the C-clamp method, make sure you have at least a 6″ C-clamp.
Piston screwed all the way into cylinder. Ensure you screw it all the way in otherwise there will not be enough clearance to get the caliper over the new pads.
Clean all brake components with brake cleaner and rags. Pull the small boot off the caliper assembly (Figure 1, Item 6). Lube the assembly with caliper lube. This allows the brake caliper to float better due to braking forces and brake pad wear.
Installation of New Components
Prior to performing installation, take a break and wash your hands! Remove all grease from them. If you bought new rotors, clean the rotor off of all protective material and paint. Wash your hands again and ensure they are clean before reassembling.

Evan Waterloo, using his Dad’s DA sander to clean and
scuff the surface of the rotors (front rotor shown).
Prior to installing the new rotor, take some grease or caliper lube and put it on the hub where the rotor comes in contact. This will prevent the rotor from rusting to the hub assembly.
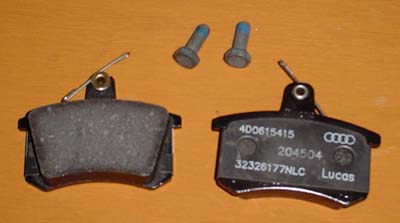
OEM pads. The OEM pads come with new bolts.
Install new rotor.
Install carrier bracket using 8 mm allen head bolts. If using OEM pads, remove backing sticker and place both pads in carrier assembly.
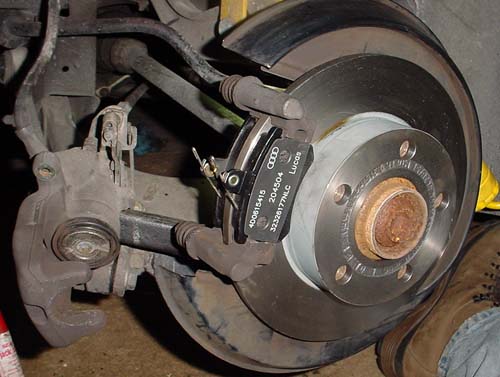
Pads placed in carrier assembly prior to installing caliper.
Install the caliper on the carrier assembly. When doing this, ensure both pad springs are properly seated and the guide pins are pushed in and out of the way. Start the bolt (Figure 1, Item 1) on the top first (don’t tighten it, just get a few turns on it) and then compress the springs by pushing down on the caliper and starting the bottom bolt.
Tighten both bolts down, torque to 35 Nm. Always replace bolts with new, OEM pads come with new bolts.
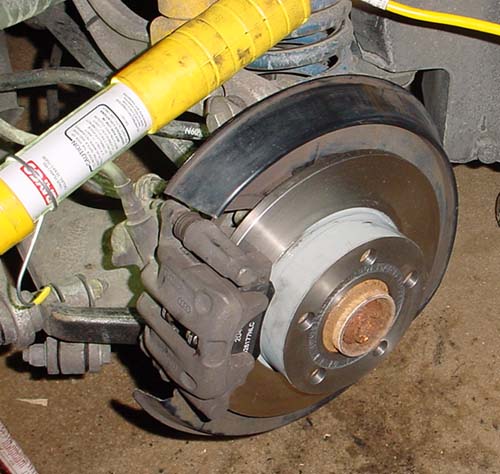
Completed rear brake job. Cleaning all the components
prior to installation is an important step!
Just how can I find the best auto mechanic? Are you in a position to point me in the right direction?