
 Posted in
  Tags:
Tags: Replace the Thermostat on a Second Generation (1995-2001) 4.0L OHV V6 Ford Explorer
Works For:
1995, 1996, 1997, 1998, 1999, 2000, 2001 Ford Explorer 4.0L OHV V6 Models
Source: ExplorerForum
Well, after replacing my thermostat I decided to do a write up on it. If you are needing to replace your thermostat, I highly recommend doing it yourself. It is easy to do, and very cheap.
Note: This is for the 4.0 OHV, not SOHC
First, a general disclaimer: I am not a Ford engineer, and do not work for Ford. Anything that you do, you do at your own risk.
Now to start. It should take about an hour to complete this, but giving yourself plenty of time is the first step. The tools I used are very common, and can be found just about anywhere.
Before you start, drain all of your coolant out of the car. This will make your life a lot easier down the road.

Tools used:
3/8″ Drive ratchet
3/8″ 2″ drive extender
3/8″ to 1/4″ drive reducer
1/4″ drive ratchet
10mm socket
8mm socket
Flathead screwdriver (not pictured)
Parts needed: Thermostat
New coolant
Now, where is the thermostat located?
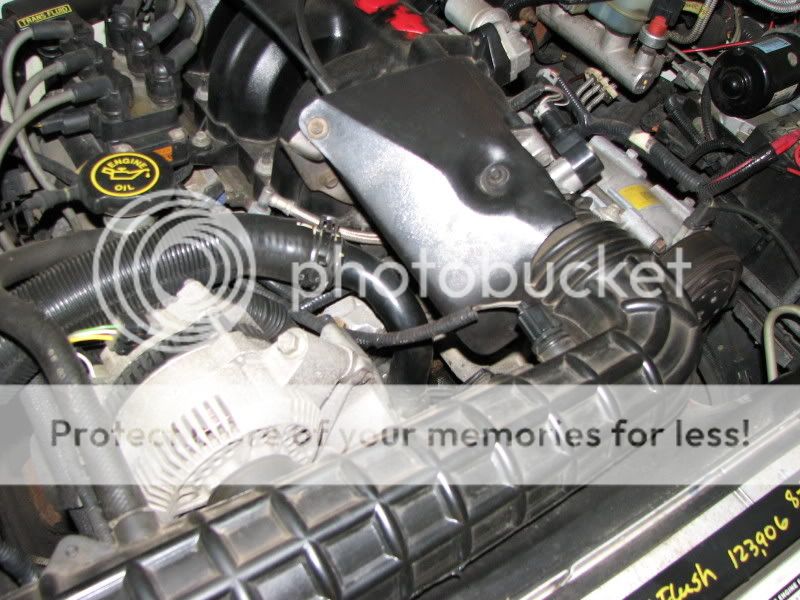
It is on the end of the hose going to both the engine block and the radiator. It is where the hose bolts onto the block.
First off: The intake needs to go. Take off the latch for the filter, unplug the 2 plugs in the intake, and pull the vacuum line out. Now, unscrew the hose clamp with the flathead screwdriver, and remove intake.

Now there is that throttle cable cover there. That needs to be removed. Take you 8mm socket, and remove the 2 bolts holding that on.
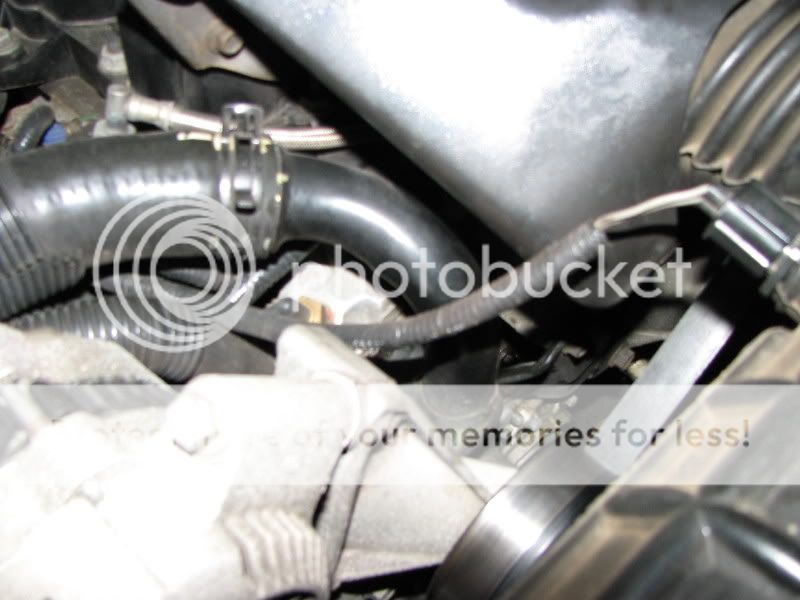
After that is removed, remove the 3 bolts holding the hose on. These use the 10mm socket. It will take some experimentation with the different extenders/ratchets I have listed, but it can be done with just that. When you are loosening up the bolts and removing the hose, be prepared for coolant to leak from there. Have something underneath the front of the truck to catch it, Either an oil change pan or just some old towels.
Once removed, you will see this:


Please note that the thermostat shown in this picture is actually the new one, yours will not look that nice. It will also be wedged in there solid, and take some wiggling to remove.
When you place in the new one, be sure it is aligned the same way, and rotated the same way as the last one.
Now, put the hose back, and tighten in the 3 bolts. Then re-attach the throttle cable cover. Now put the intake back on. Be sure to re-attach both sensor plugs, and also the vacuum line.
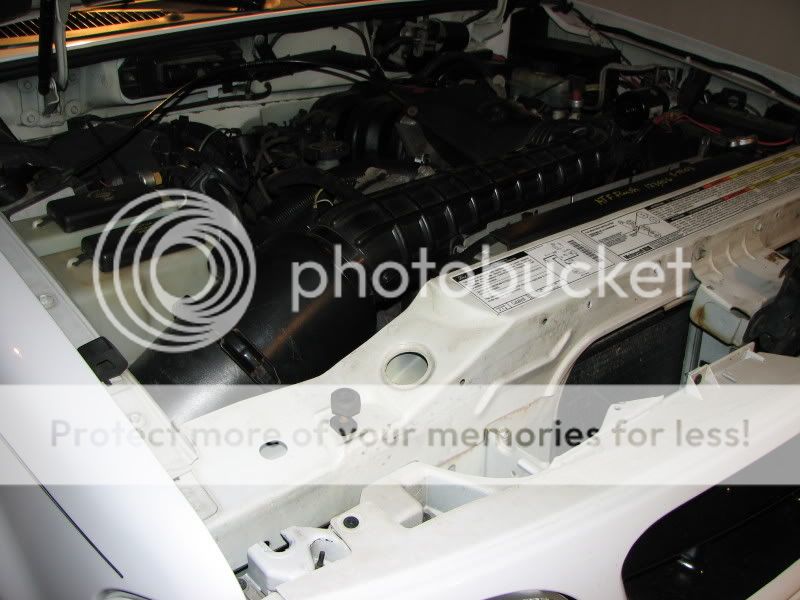
Now, refill the coolant and burp the system.
You have now successfully changed your thermostat. Take it for a drive, then check for any leaks.
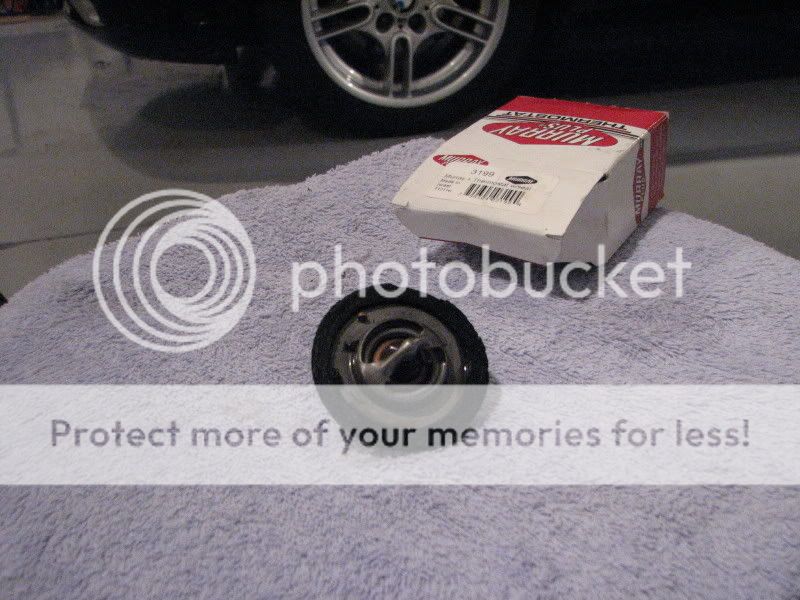
This is the old thermostat. Note how the gasket around it is worn and chipping.
Just remember, replacing your thermostat is easy to do yourself, and a lot cheaper too. Just take your time, and everything should go fine! If I have left anything out that you think should be added, be sure to add it or let me know!
This article is helpful. Thanks. Another nice thing to have during this thermostat job is one of those “universal joints” to go with the ratchet drive extender. This will allow you to turn the bolts at a more comfortable angle. Most socket sets include one of these.
Hi. I found a milky-pink liquid in my transmission fluid filler thingy, so I troubleshooted what it could be. Found out after many hours of research that the most likely cause was a failure in the radiator (whether internal or not, I am guessing that is a yes). What occurred was the radiator cooling coils were not doing their ‘job’ as required, thus transmission and anti-freeze made this unpleasant appearance. So, I just replaced the radiator & thermostat (I figured why not a thermostat too) in my 1995 Ford Explorer XLT 4×4 4dr (4.0L V6). Here are the steps I have taken to CEASE further damage to my transmission:
(Begin with this PAGE)
REMOVAL OF RADIATOR
1. PRAY!
2. Disconnect NEGATIVE battery cable.
3. Spray ALL areas to be broken loose and/or ‘removed’ with Liquid Wrench.
4. After making sure there is a catch pan underneath the radiator, open the radiator drain. Leave opened & let drain.
5. Remove the intake hose area by disconnecting the mass air flow thingy & the other attached connections (both sensor plugs, and the vacuum line). Just get this thing out of your working area!
6. Using the (2) proper tools you will now “break” loose the fan clutch bolt from the water pump pulley.
7. Now, you should be able to fairly easily spin the plastic fan off with your hand.
8. Remove the (2) bolts from the fan shroud, both located at top.
9. Remove reservoir hose from radiator filler neck.
10. Pull out the fan & shroud together. You will now have full access to the radiator hoses.
11. Disconnect the entire upper radiator hose. Inspect hose. Clean if necessary.
12. STOP. Make sure there is a catch pan underneath the lower radiator hose area(s); carefully disconnect it because it WILL drain liquid. Inspect hose. Clean if necessary.
13. Using the (2) proper tools you will now disconnect BOTH transmission lines. Be sure not to bend transmission lines!
14. Remove the (2) bolts from the radiator, both located at top.
15. Pull out old radiator.
16. STOP. The next procedure is: REMOVAL OF THERMOSTAT.
REMOVAL OF THERMOSTAT
1. Remove the (2) bolts from the throttle cable cover. Set aside the housing.
2. Disconnect the belt pulley. Use ratchet.
3. Place the loose belt above itself (near alternator area).
4. Remove ALL (3) bolts on thermostat housing. (One bolt is easy to remove; one is underneath & hard to see; and the 3rd bolt is a pain in butt to remove).
5. Remove the thermostat housing. Inspect housing. Clean if necessary.
6. Pop out the old thermostat. It may need a wiggle. Inspect it. Notice if a gasket was/is on it. (We may need one if the new thermostat does not have a gasket).
7. Install the new thermostat with vent hole facing top, (12 o’clock).
8. Reconnect the thermostat housing, starting with the pain in butt bolt.
9. STOP. Go to: INSTALLATION OF RADIATOR procedure
INSTALLATION OF RADIATOR
1. First, compare the old radiator with the new radiator.
2. ALL missing hardware (radiator cap & two bolts) from the old radiator must be installed onto the new radiator. The (2) transmission bolts should be hand-tightened onto the new radiator. If no sealant included, use Teflon tape around threads.
3. Reinstall pulley.
4. Reinstall belt, making certain the belt is firmly in place and is correctly inserted into the grooves.
5. Slide the new radiator into place—it sits on perches.
6. Install the (2) bolts into the radiator, both located at top.
7. Using the (2) proper tools you will now reconnect BOTH transmission lines.
8. Reconnect lower radiator hose.
9. Reconnect the upper radiator hose, also making certain that ALL hoses are returned to their appropriate housing stations.
10. STOP. The LAST procedure is: COOLANT INSTALLATION.
(Begin this page LAST)
COOLANT INSTALLATION
1. Make certain radiator drain plug is closed & the reservoir hose is connected to both the radiator and reservoir tank.
2. Fill coolant system with antifreeze-water mixture. Do not exceed 70% of straight anti-freeze into radiator!
3. Start engine.
4. Check for leaks.
5. Allow engine to get to “normal” temperature. You will when you have reached “normal” temperature when upper radiator hose gets hot.
6. Re-check coolant level & coolant reservoir. Adjust if necessary.
7. STOP. The next procedure is: TRANSMISSION FLUSH!
My 2001 Ford Explorer Sport has a hard plastic cover over the top/middle of the engine (over the carburetor area. This cover is blocking my access to the thermostat. How do I remove that cover? I don’t see it on any posts online.
Thanks Paul