
 Posted in
  Tags:
Tags: A DIY for installing a Rear Camber Kit on a 8th Generation (2008-2011) Honda Accord
Works For: 2008, 2009, 2010, 2011 Honda Accord Models
Source: DriveAccord.net
This is an easy install. From the time I started jacking up the car until the time the last bolt was tightened was only 45 mins and that includes taking pictures while working by myself. If I was to do it again, I could probably do it in 30 mins.
Tools needed:
- Floor jack
- Jack stands
- Wrenches: 14mm, 17mm, adjustable
- Ratchet & sockets: 14mm, 19mm
- Hammer
- Wheel chocks, a piece of wood will work
Helpful optional tools:
- Impact gun
- Air ratchet
- Pry bar
- 14mm swivel socket or swivel extension
- Creeper
- Torque wrench
Alright, here we go!
- Loosen the lug nuts on the rear wheels. If you are using an impact gun use a 19mm impact socket.
- Jack the car up high using the floor jack on the rear tow hook and chock the front wheels.
- Put the jack stands under the rear jacking points (look in the owner’s manual) and let the floor jack down enough so that it sits on the jack stands. Leave the floor jack in place to act as a safety in the unlikely event one of your stands fails. If a stand fails and the car lands on the floor jack, GET OUT!

- Remove the rear wheels.
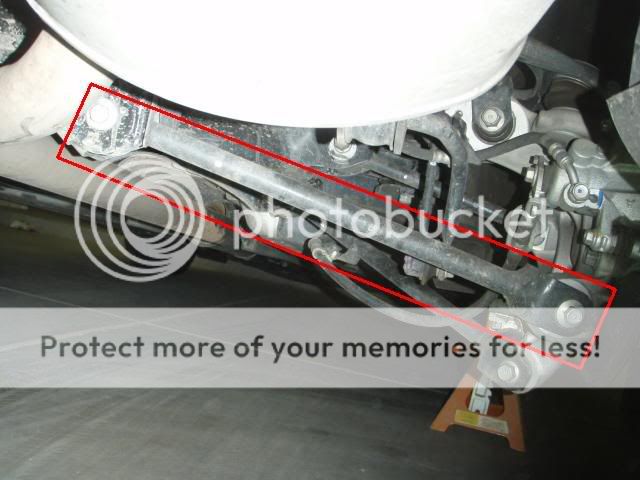
- Look for the arm circled in this picture. This is the camber arm that you are replacing. There are two bolts, one on the inside on a bracket and one on the outside on the spindle. You will need a 14mm wrench or socket to take them off. Both the bracket (inside) and the arm (outside) have a nut welded on one side so you do not need to put a wrench on the other side.
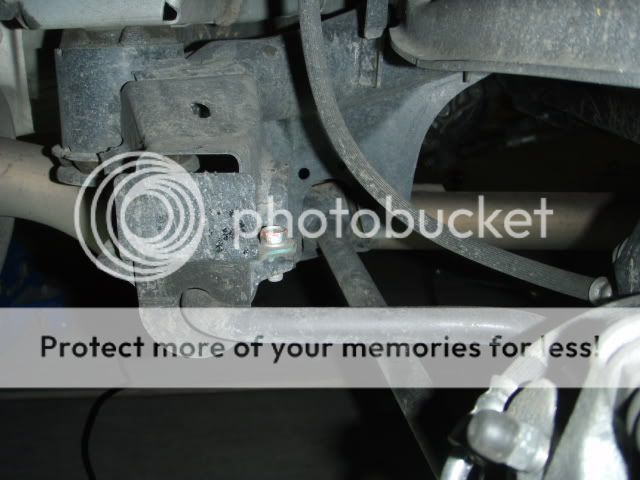
- The outside bolt on both sides is easy to remove as nothing is in the way. The inside bolt on the driver’s side is easy to remove (may be more difficult on V6 due to dual exhaust). I used an impact gun with a 14mm impact socket on all three.

- The inside bolt on the passenger’s side is more difficult to remove because the exhaust is in the way. You have a couple of options. You could pull the exhaust off the hangers, use a wrench, or do like I did and use a 14mm impact swivel socket on an air ratchet.

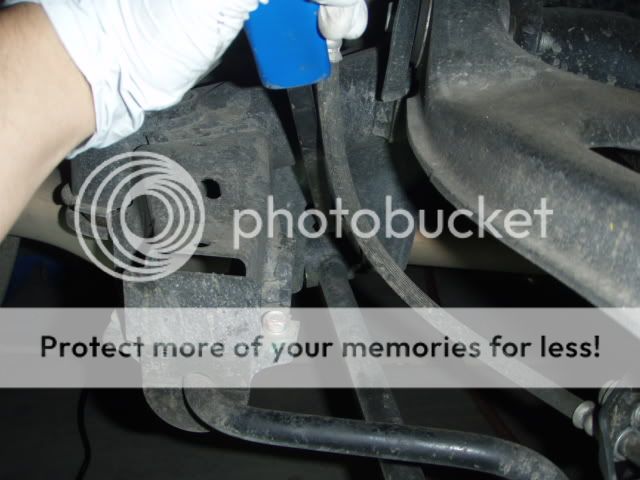
- With the two bolts out it is now time to remove the arm. But there is one little problem. The spindle will try to come in towards the center of the car and will push the camber arm towards the center of the car and further into the bracket.
- Two choices here. If you have a helper they can pull out on the bottom of the spindle and you can hit the arm with a hammer near the bracket and it should come out. I was working alone so I put a pry bar in between the camber arm and bracket, pried the arm out, then hit it with a hammer with my other hand. It was easy and only took three or four blows with my little sledge. If you use a pry bar be careful of the brake line. The side of the arm that is on the spindle should just fall off once you get the other side out. If not, one good blow from the hammer should knock it right off.
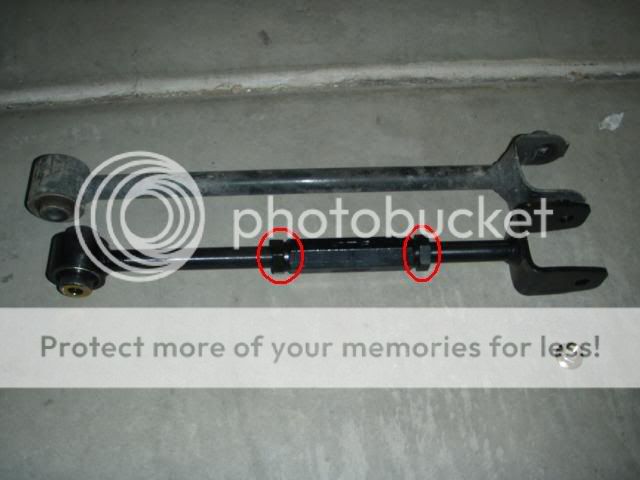
- The instructions that come with the kit will tell you to adjust the new arm to the same length as the stock arm, but I will give you a little hint that will make your life easier, especially if you are working by yourself. The stock arm is 17 inches from the center of the outside mounting hole to the center of the inside mounting hole. Instead of adjusting the new arm to 17 inches, adjust it to 16-16.5 inches. By making it shorter you will not have to fight the spindle’s evil desire to push the arm too far into the bracket.
- To adjust the arm length loosen the two nuts (circled) on either side of the long center adjustment nut and turn both sides of the arm until you get the length you want.
- The instructions didn’t specify so I just adjusted both ends of the arm so there was about the same amount of thread on both sides. I figure this will give the alignment guy the most amount of adjustment.

- Install the arm by putting the inside part into the bracket and reinstalling the bolt. Snug the bolt but do not fully tighten it.
- Put the outside part of the arm on the spindle mounting point. If you made the arm short like I did you can just line it up and then turn the adjustment nut until the holes line up so you can easily install the bolt. The new arm does not have a nut welded on the end but it does come with a nut (use a 17mm wrench). Snug it up but do not fully tighten.
- With both arm bolts in place you can turn the adjusting nut until you get the length to 17 inches from the center of the inside bolt to the center of the outside bolt. You can then tighten both of the nuts on either side of the long adjusting nut. I don’t know what size the nuts are as my biggest wrenches are 22mm and 1 inch, and both were too small. I just used a large adjustable wrench.

- Here is a pic of the arm installed with the wheel off.

- Repeat on the other side.
- Reinstall the rear wheels, jack the car back up, remove the jack stands, and lower the car.
- Tighten all four bolts (inner and outer on both sides) to 70-85 lb-ft. I could only torque the driver’s side inner bolt due to not having enough clearance with my car on the ground. What I did on the other three bolts was just tighten them as much as I could with a wrench. I have an alignment appointment tomorrow at the dealer only 3 miles away, so the car will just sit in my garage until then. I will have the tech torque all of the bolts when the car is on the rack.
- Finally, here’s a pic of the arm with the wheel on, the car on the ground, and all of the bolts tightened.

I hope this helps anyone that is thinking of doing this install themselves. As I said in the beginning, if you are fairly handy it is a very quick, easy install. It took me longer to write this DIY than it did to actually install the parts. 
If any of the steps are confusing or you have any questions, please let me know so I can edit this DIY to make it more useful.