
 Posted in
  Tags:
Tags: Replace the Water Pump on a Honda CR-V (2002-2006) or Honda Element (2003-Present)
Works For:
2002, 2003, 2004, 2005, 2006 Honda CR-V Models
2003, 2004, 2005, 2006 , 2007, 2008, 2009, 2010, 2011, 2012 Honda Element Models
Source: HondaSUV
Well, since I’ve gotten so much information from this board over the years, I decided it’s time to give something back. Here is my write-up of how to replace a water pump on a 02-05? ( 2nd Generation) CR-v. This should also apply to the Honda Element as well. I coulnd’t find a write up like this anywhere, but I decided to attempt this anyway. Save yourself about $600 over having the dealer perform this job. ![]()
Disclaimer:
Perform at your own risk. This is merely a guide and not a replacement for real mechanical skill or knowledge. I make no claims or warrantees for this guide. Always follow all safety procedures. ![]()
Time Required:
The job took me about 5 hours total, but I got stuck on 1 bolt, which wasted about an hour of that time. With this guide, I would imagine the average shade tree mechanic could complete the job in 4 hours or less. I also decided to replace the radiator hoses, heater hoses, and thermostat while I was in there. This added an additional hour to the job.
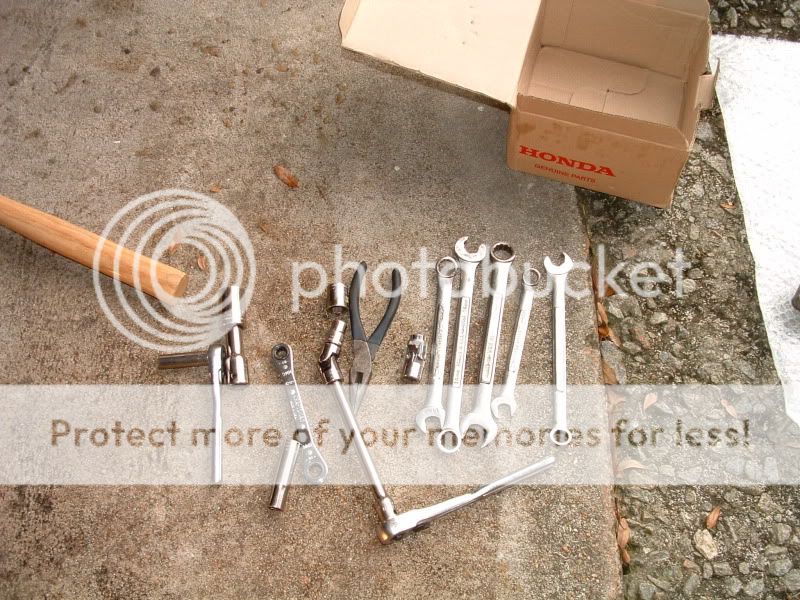
Tools Required:
Don’t attempt this job unless you have a decent set of mechanic’s tools. I used a lot of 3/4 inch ratchet extensions and swivels, because some of the bolts are hard to get to. Make sure you have every available 10mm socket/extension/etc before beginning the job.
Difficulty:
On a scale of 1-10, I would rate this as a 4 or a 5. Some of the bolts are very difficult to reach, and it takes a lot of patience to get the water pump bolts in and out. It can be done, and you will save a lot of money over having the dealer perform the job. This guide will help you go right were I went wrong.
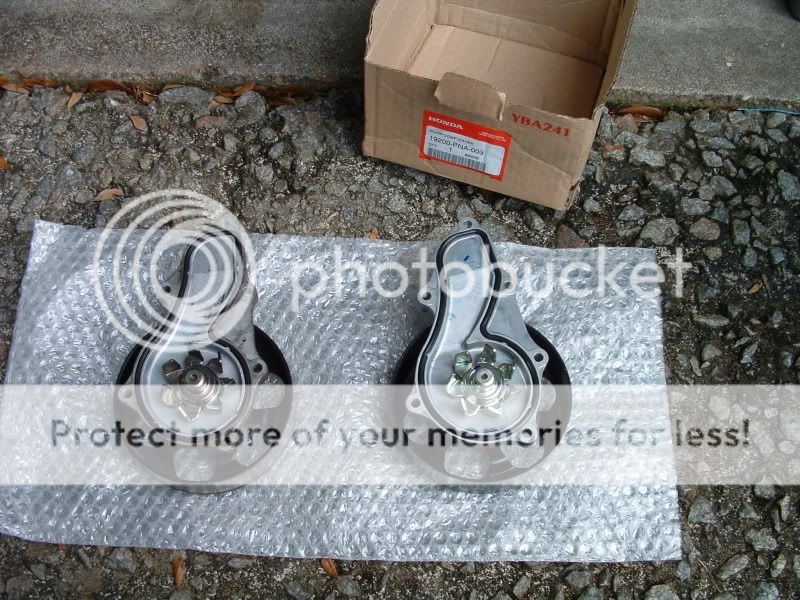
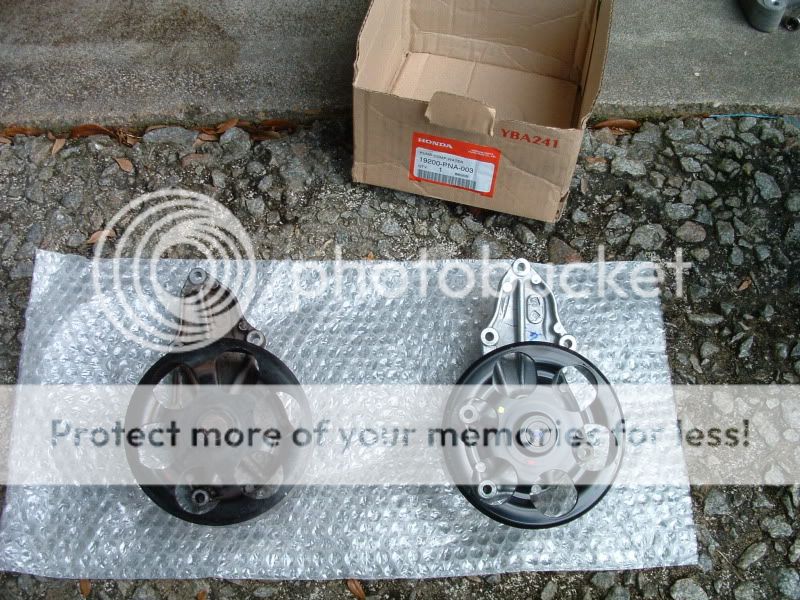
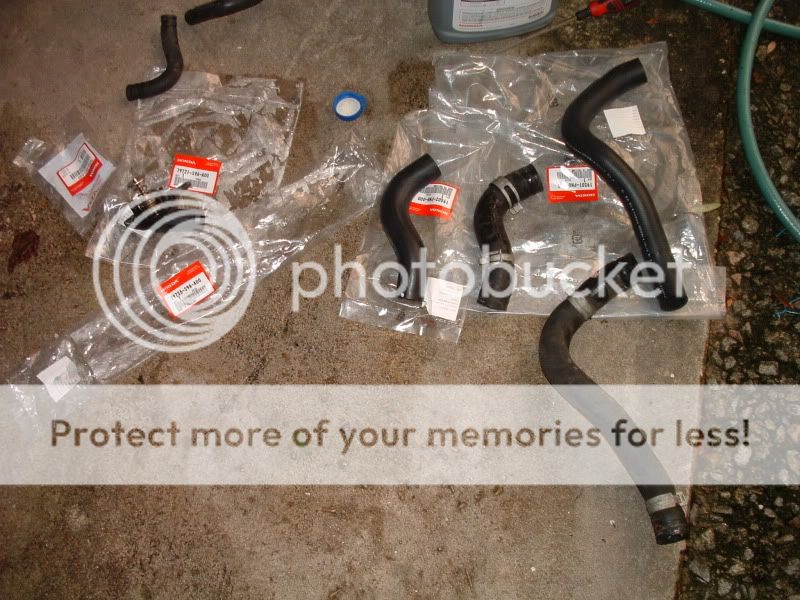
Parts required and cost:
I bought the water pump, coolant, and everything else I used for the job from one of those online Honda parts dealers. There are several out there, and I’ve had good luck with Bernardi Parts. I spent a little over $200 on all the parts I replaced.(I replaced quite a few optional parts) The water pump itself is a little over $80, and a gallon of coolant is about $11.
Notes:
Make sure you have plenty of time and have everything you need beforehand. Once you start the job, your CR-v will not be drivable until you finish. Be safe, use jack stands, and always brace the vehicle properly before working on it. Do not work on surface that is not level. This is performed on a 2002 Cr-v 4wd 5spd. It may be slightly different for the automatic model.
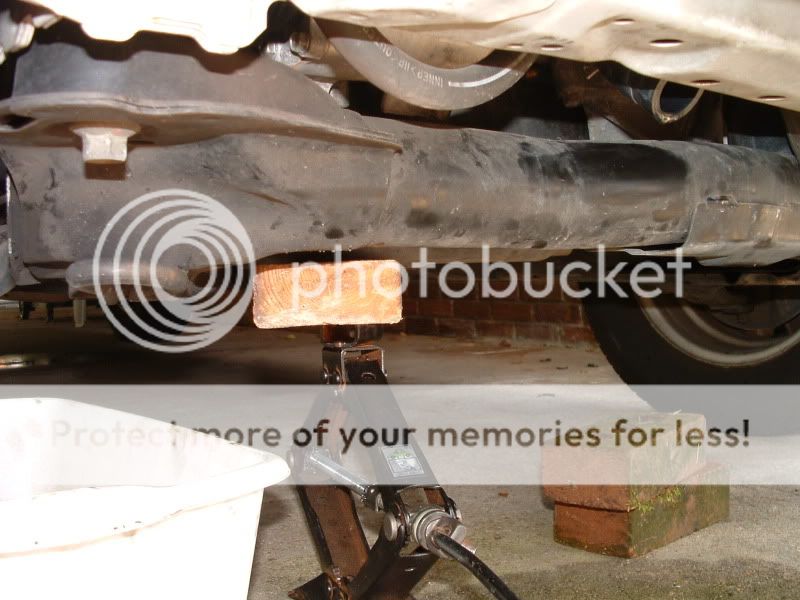
Step1: Anyway – before beginning your work, always make sure the engine is cool. Apply the parking brake. Jack up the passenger side and remove the wheel.
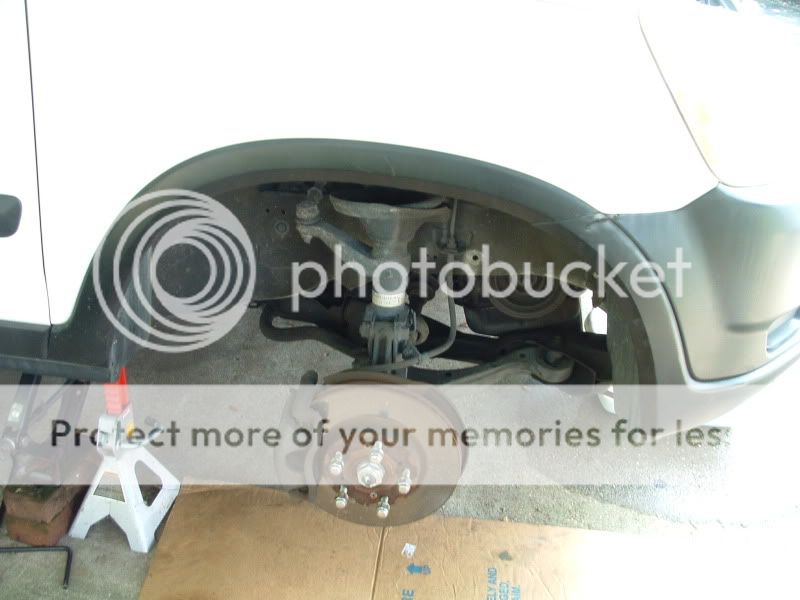
Step2: Remove the splash guard underneath the car. Remove the plastic radiator cover that covers the top of the radiator(optional). To remove the plastic clips, just pop them up with a screwdriver.
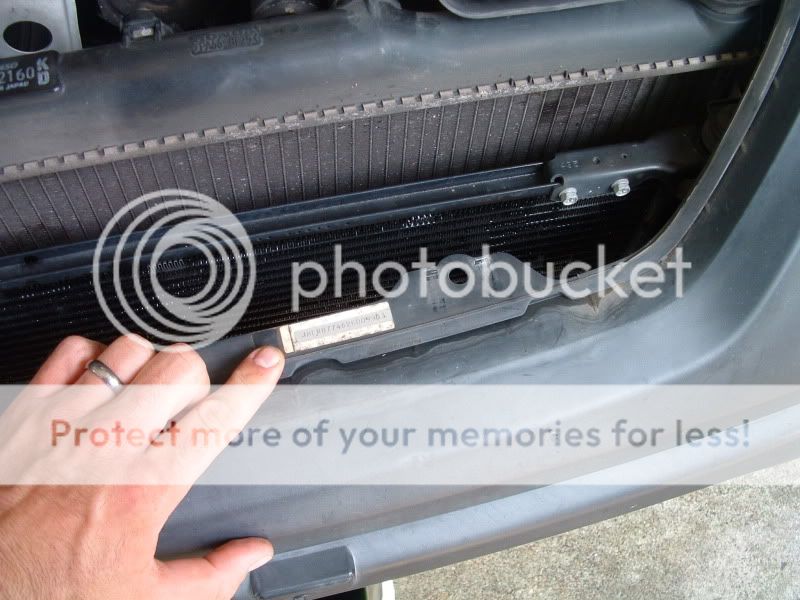
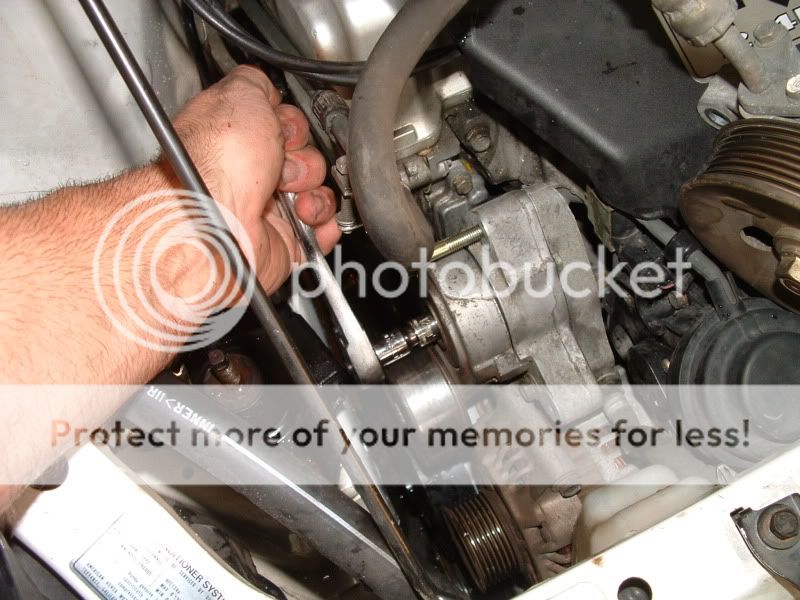
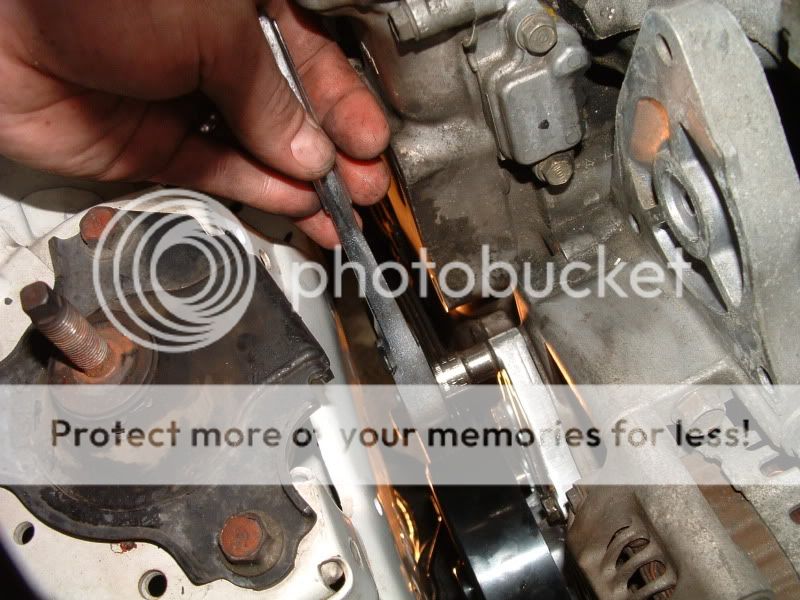
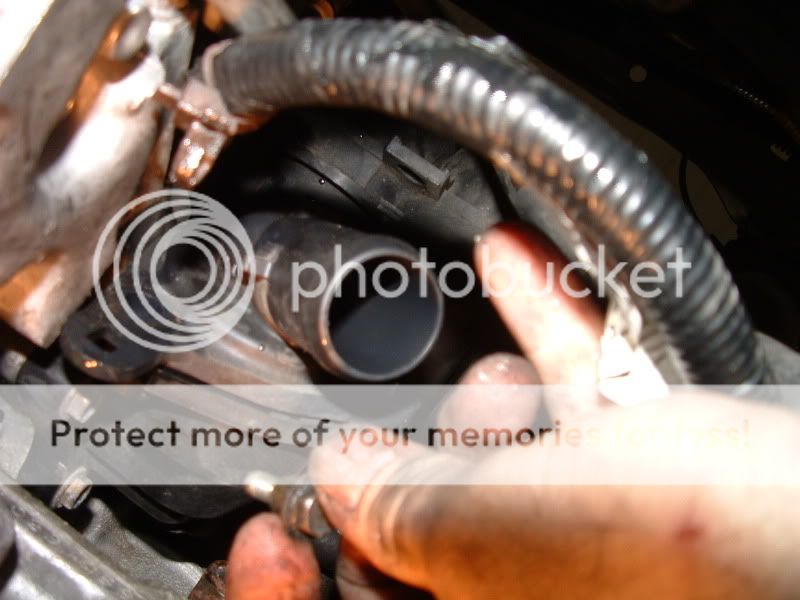
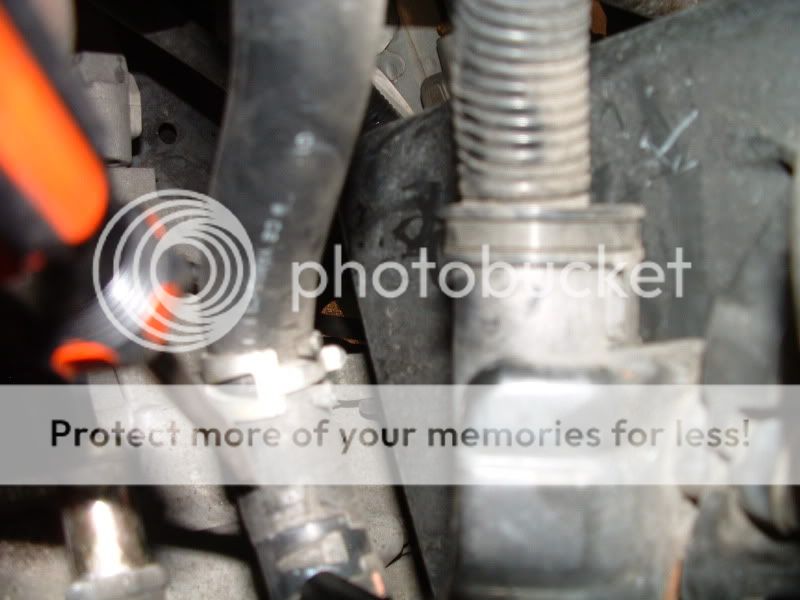
Step3: Drain the coolant. Locate the white thumbscrew, remove it and have a pan ready to catch the coolant. I took the top hose of to make it drain faster. Remove the engine belt. Use a 14mm wrench to squeeze the tensioned enough to allow you to slide the belt off.
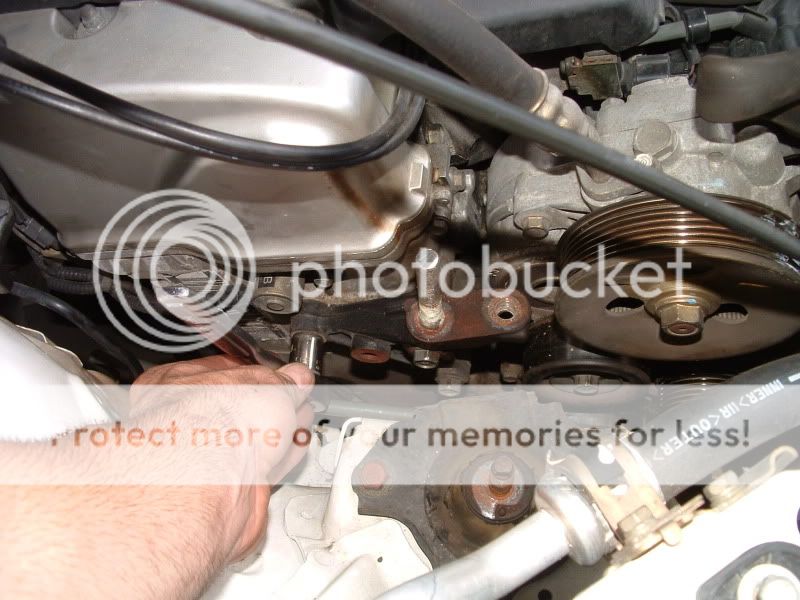
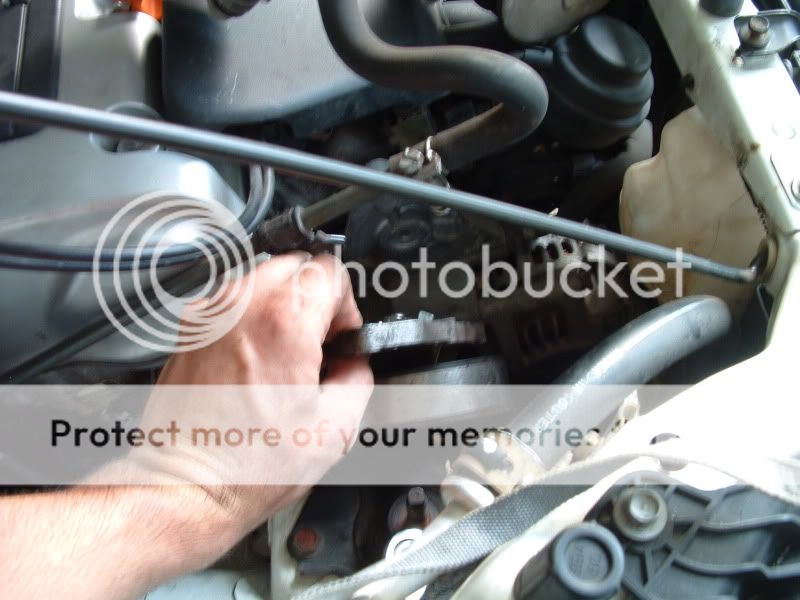
Step4: Remove the power steering pump. It’s held on by two 12mm bolts. There is a power steering line that runs along the sub frame from the bottom of the pump. Remove the two 10mm bolts that hold this line to the sub frame. You can now set the entire power steering assembly off to the side. Nice.


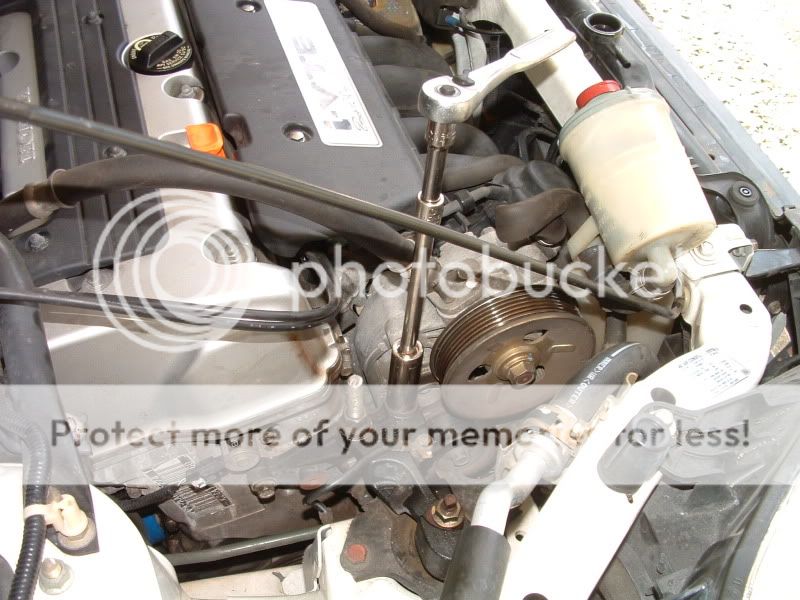
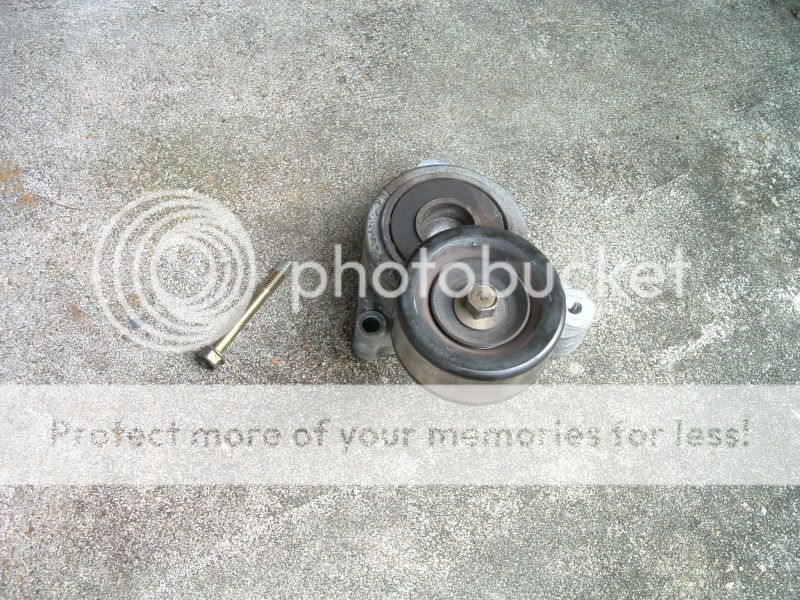
Step5: Remove the belt tensioner. There are three 12mm bolts and one in the center, I believe. Set the tensioner aside.
Step6: Place a jack and pad underneath the engine. This will hold the engine up while you remove the engine mount.

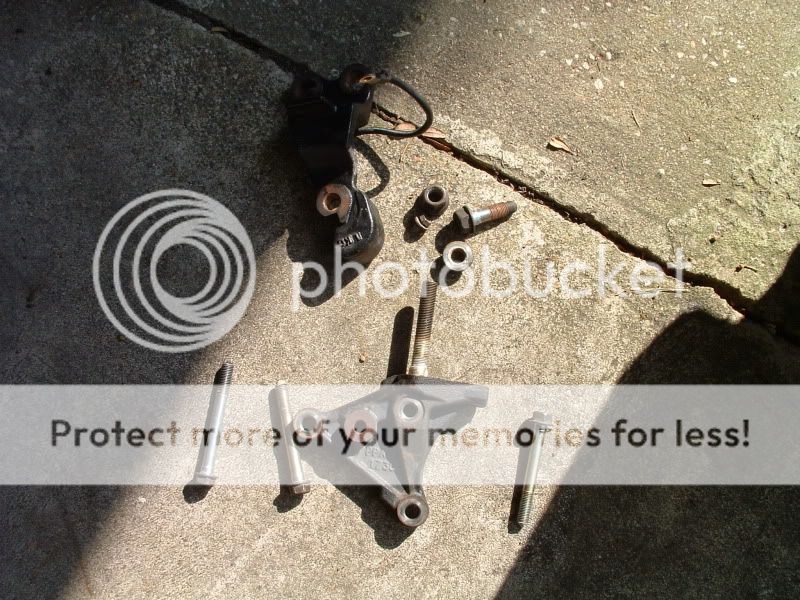
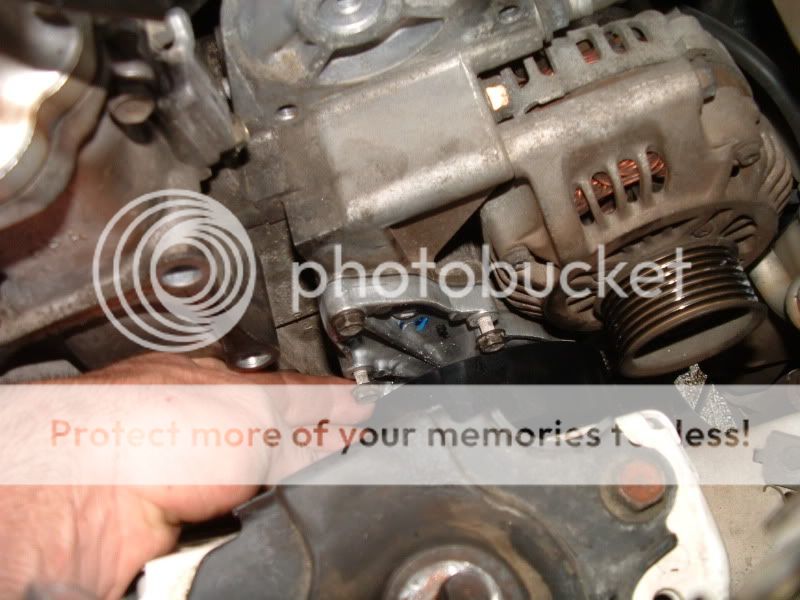
Step7: Remove the engine mount and engine mount bracket. This part can be a bit tough. These are 17MM bolts and they are tough. First remove the three bolts that hold the mount to the sub frame. Lift this piece straight off. Next, remove the three 14mm bolts that hold the bracket to the engine. Lift the bracket out.
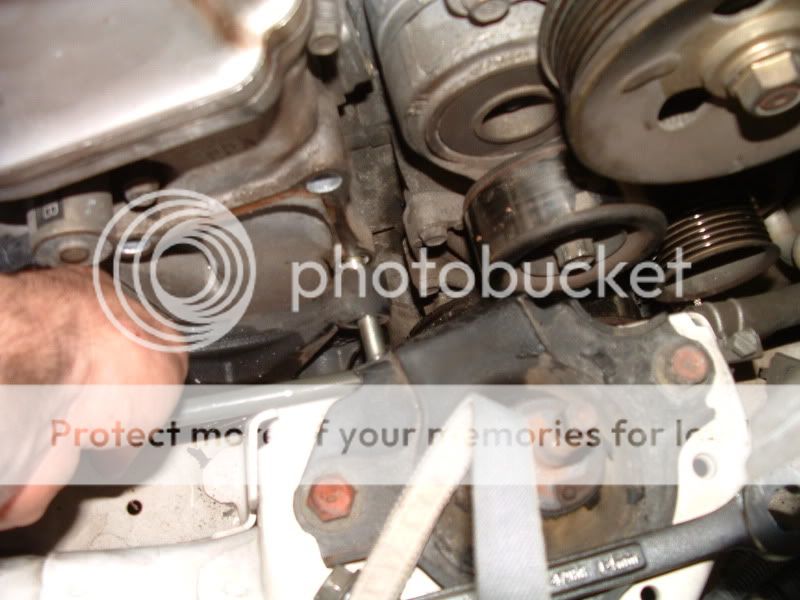
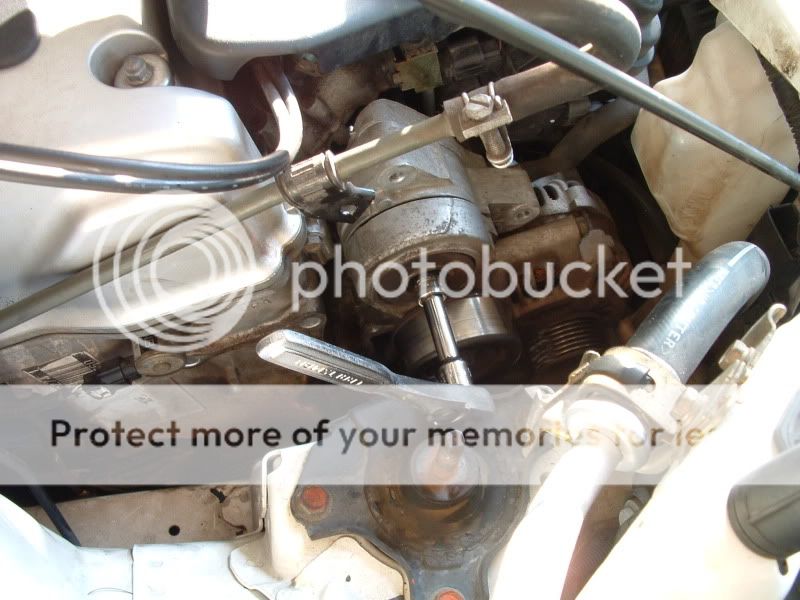
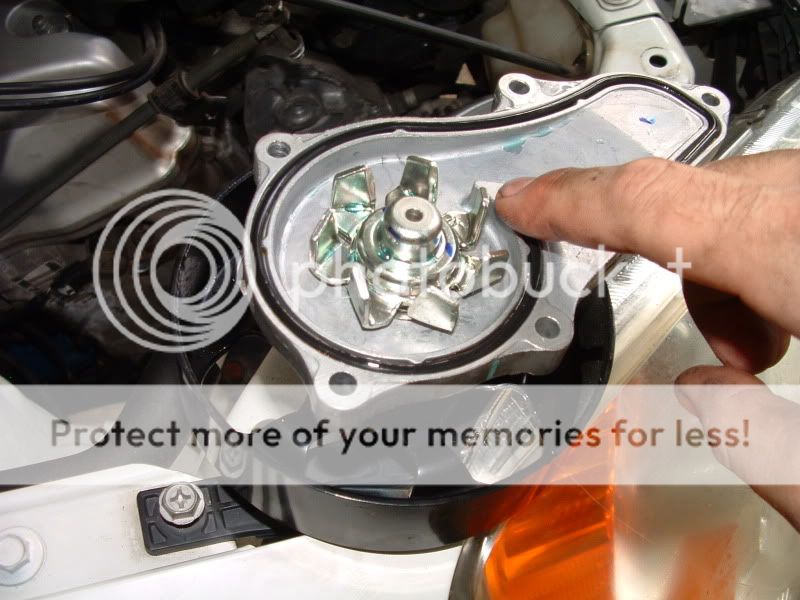
Step8: Now you can see the water pump! There are 6 bolts that hold it to the engine. They are all 10mm bolts. The top three are fairly easy to reach now. You can use your engine jack to raise and lower the engine a bit to make it easier to get at some of the lower bolts. The bottom three bolts took me quite a wile to remove. The bottom one that is closest to the front of the car was the hardest to get to. Here is how I eventually got it off. I used a 1/4in ratchet with a 10mm deep well socket on it. When the water pump comes off, more coolant will splash out at you. Be ready for it.
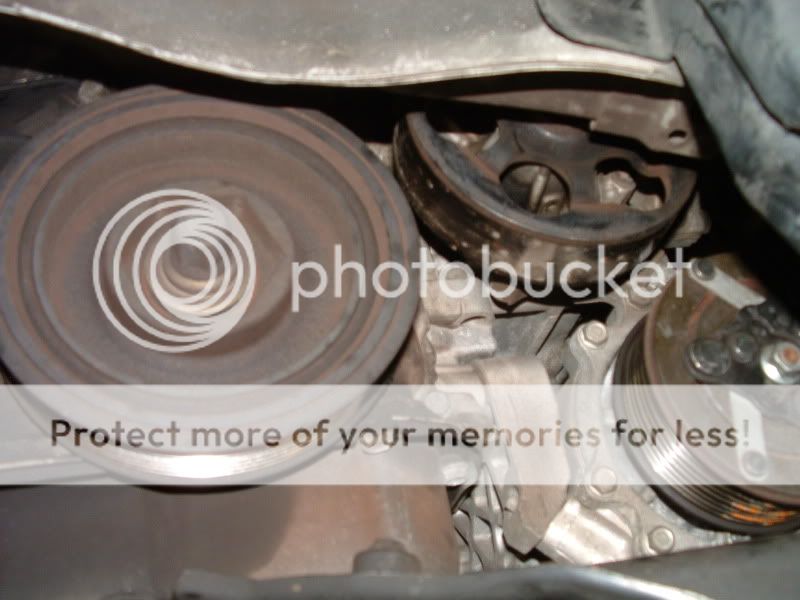

Step9: Now that all the water pump bolts are removed, you can pull out the water pump from the top of the engine. Take a break, you will need a lot of patience for the next part!
Step10: Install the new water pump. First, wipe some fresh coolant on the new gasket to help make a good seal. Then wipe the area where the pump attaches to to make sure it’s free of dirt. Then slowly lower the new water pump down into the side of the engine. Install the top 3 bolts first, then go for the 3 lower bolts. It took me a while to get the bottom three bolts back in, but using the engine jack to lower the engine a bit, I was able to get them all back in. I don’t know the torque specs, not like you could get a torque wrench in there anyway.
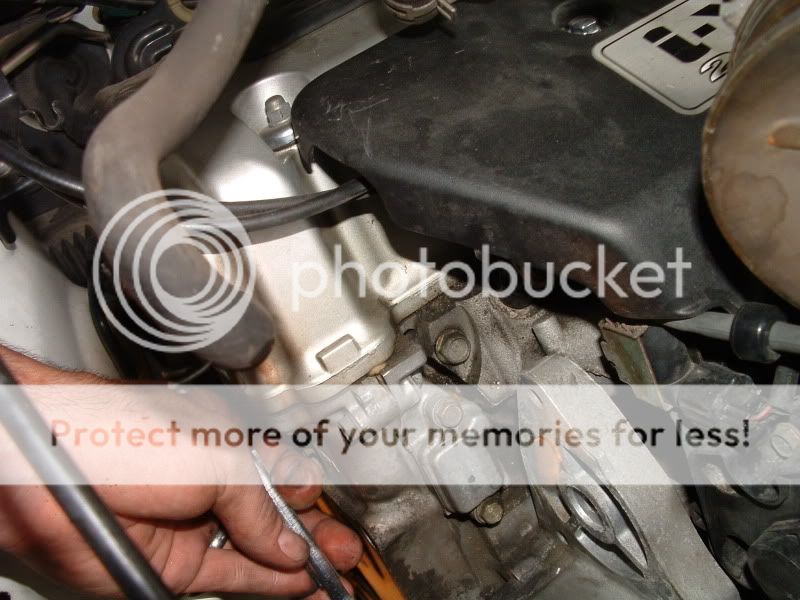
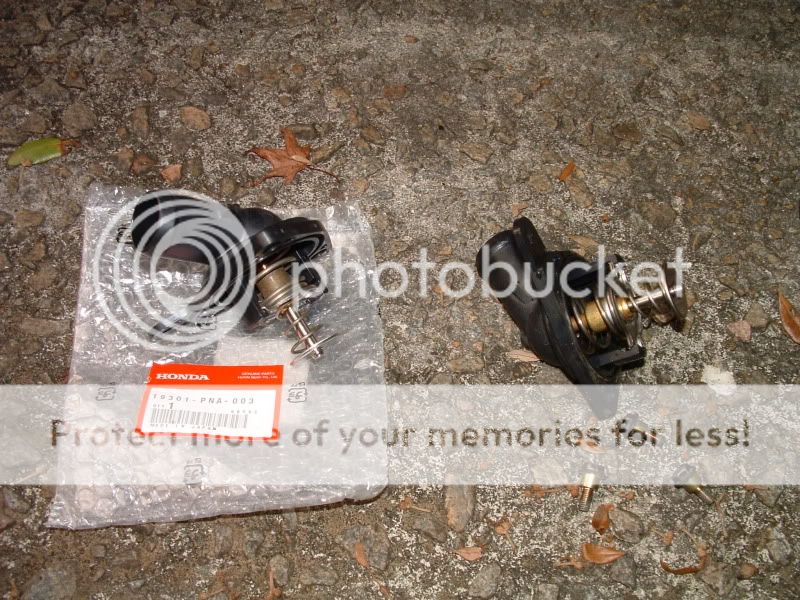
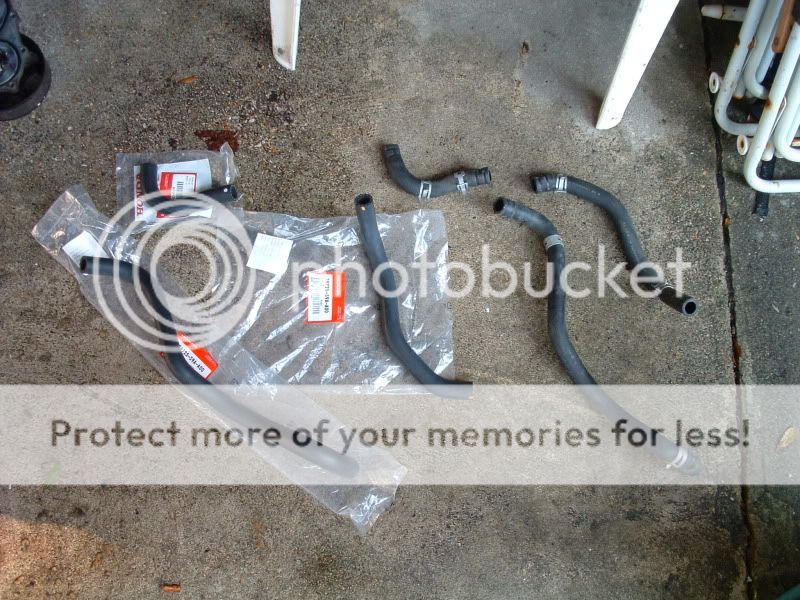
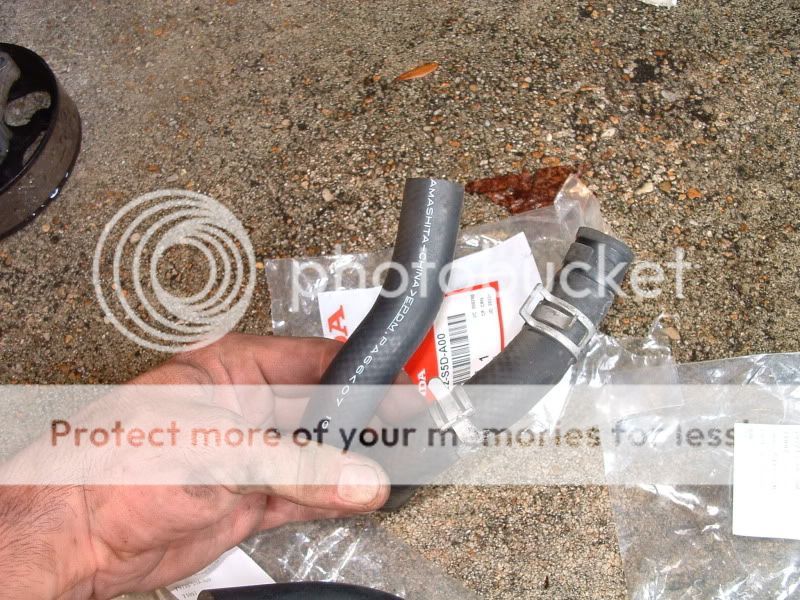
step11: (OPTIONAL) I figured that since I already had the coolant drained, i ought to change out the radiator hoses and thermostat, since this CR-V is over 100K miles. The radiator hoses are pretty straightforward, just take the clamps off, remove the old hoses, and install new ones. My old hoses were not brittle at all, but they did look like they could use to be replacd. Most people probably won’t baother, but each hose is $6-$10, and that’s cheap insurance if you ask me. The thermostat is located where the bottom radiator hose comes out of the engine. There are three 10mm bolts holding it in. Expect another splash of coolant when you take this piece out too. Install the new thermostat.


Step12: Now you need to re-install the belt tensioner and power steering pump. Installation is the reverse of removal.
Step13: Re-install the engine mount bracket and engine mount. Install is the reverse of the removal.
Step 14: Re-install the belt. Then do a final check of the entire engine to make sure there are no bolts, fasteners, or anything else left in harm’s way. You don’t want to start your engine and found out you forgot to bolt something back in. Don’t forget to replace the radiator drain plug at the bottom!!!!!!!!!
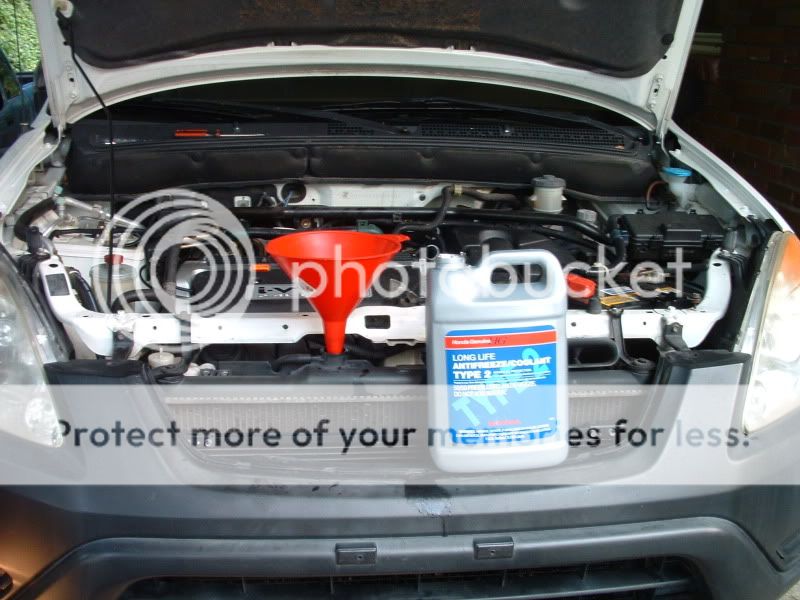
Step 15: Fill the cooling system with Fresh Honda coolant. I think the total capacity is just over 2 gallons. Once the system is full, start the engine and turn the heater to high. Run the engine until it is warm, and replace coolant as it is taken into the engine. Be careful at this point. Things will start to get very hot. Check for leaks around the new water pump. Hope there aren’t any.
Step 16: Once you’re satisfied that everything is good. Put the splash covers and plastic trim pieces back on. You are finished.
Lots of pics and good description. How do you get the photos so theya are not all blurred?
Question, which belt runs the water pump on a 2002 honda crv??
Once again photobucket has ruined an excellent write up. Any possibility of replacing these fuzzy pics with the originals? It would be very helpful.
Thanks