Posted in
  Tags:
Tags: Replace the Cabin Air Filter on a Subaru Outback
Works For:
1995, 1996, 1997, 1998, 1999, 2000, 2001, 2002, 2003, 2004, 2005, 2006, 2007, 2008, 2009, 2010, 2011 Subaru Outback Models
Source: SubaruOutback.org
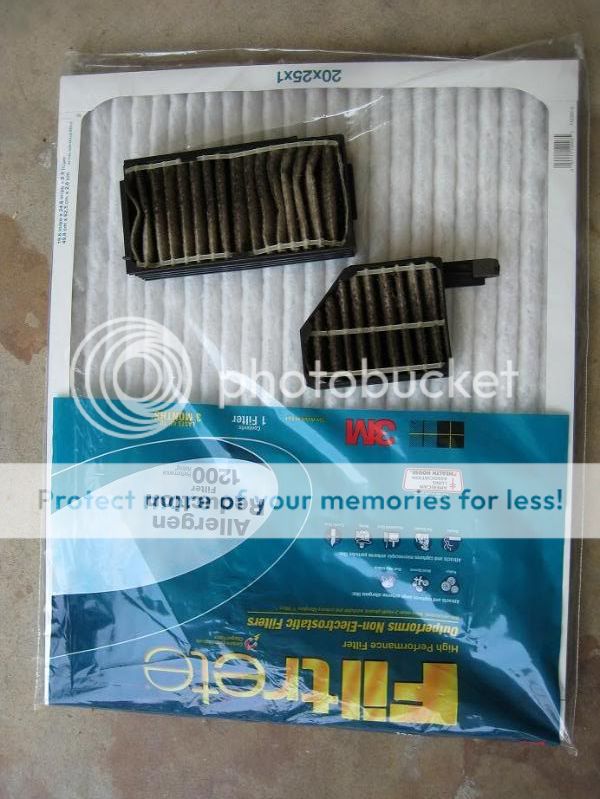
Just did mine today, went to WallMart and picked up great air filter for $12 bucks.
-Pulled out the nasty filter elements from the little plastic frames.
-Trimmed new electrostatic filter to fit.
-Popped it in. Reassembled… Done.
Took about 45 minutes, including manufacturing, and cleaning of parts. (I always clean parts before reassembling, you never know when you’ll be in there again)
-And I have enough filter element left over to do it at least 2 more times 
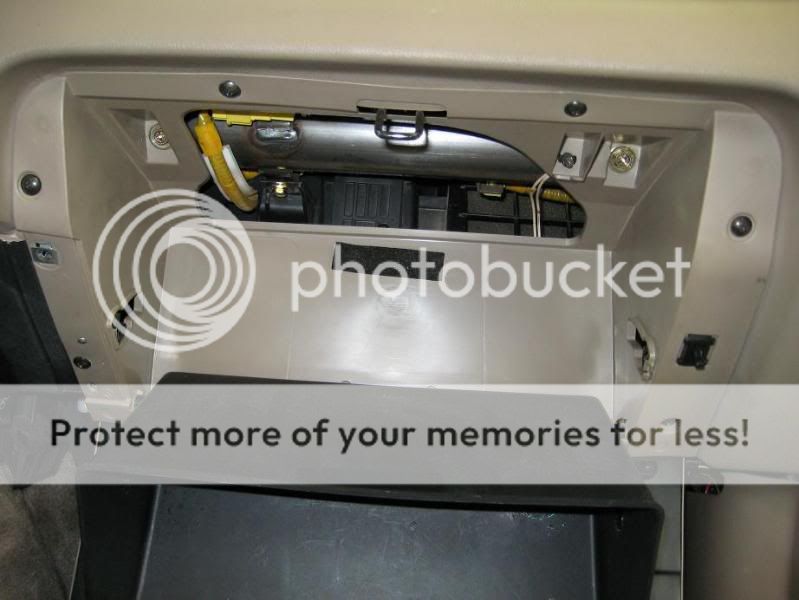
Glove box push pins pushed, glove box swinging
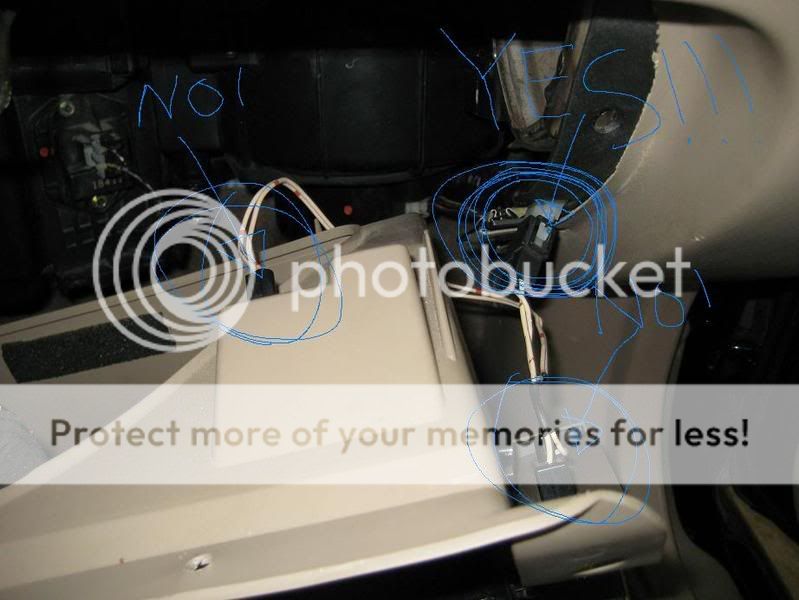
Drive 8 hours down then up I-95 just before i got here, should have taken a nap. The one plug that is circled in blue with an arrow pointing to it that says “Yes” is the only plug you need to remove. The other part of that plug which remains attached to the dash, will be a pain to work with when you try to hook it back up. Its cord is very short, you have to figure a way to prop the glove box up close enough to hook them back together when re-installing
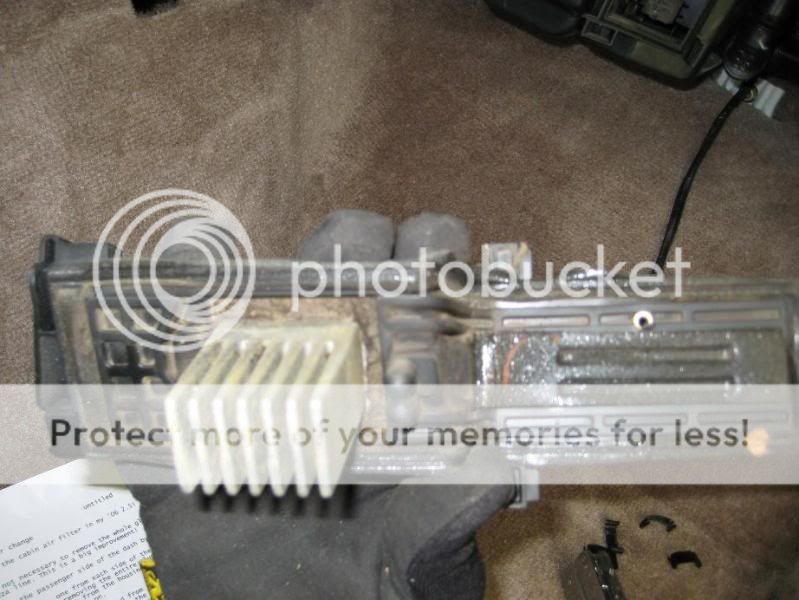
Remove the plug from the thermostat sensor. Then pop off the 4 snap clips holding the sensor assembly in place, be careful not to shoot one into your eye. Don’t ask how I know that…
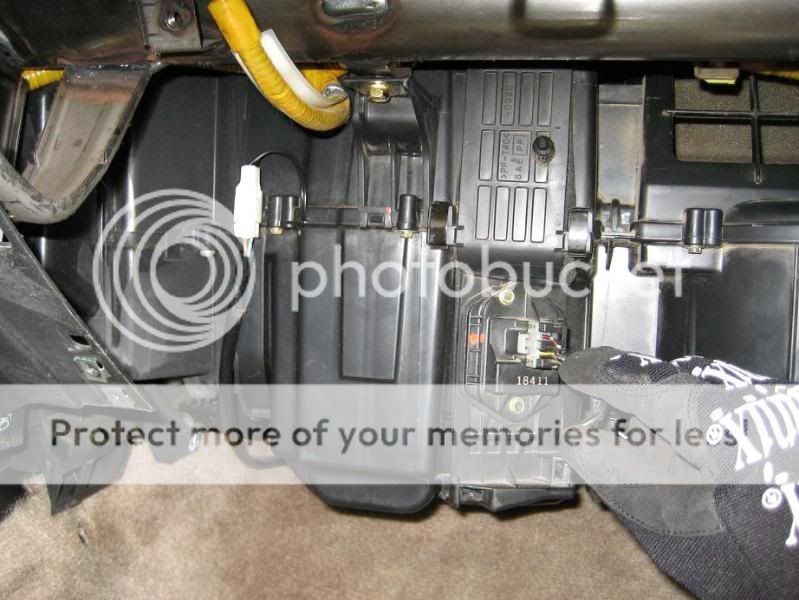
Remove sensor assembly, pull the bottom out slightly, then slide it down a little until the 2 top tabs disengage. Flip that bad boy over, and clean with a stiff brush.
Pull out bottom filter element using handy anti vibe tab (Crunch, begins to wonder if dealership really did change filters like I asked (and paid!) them too)
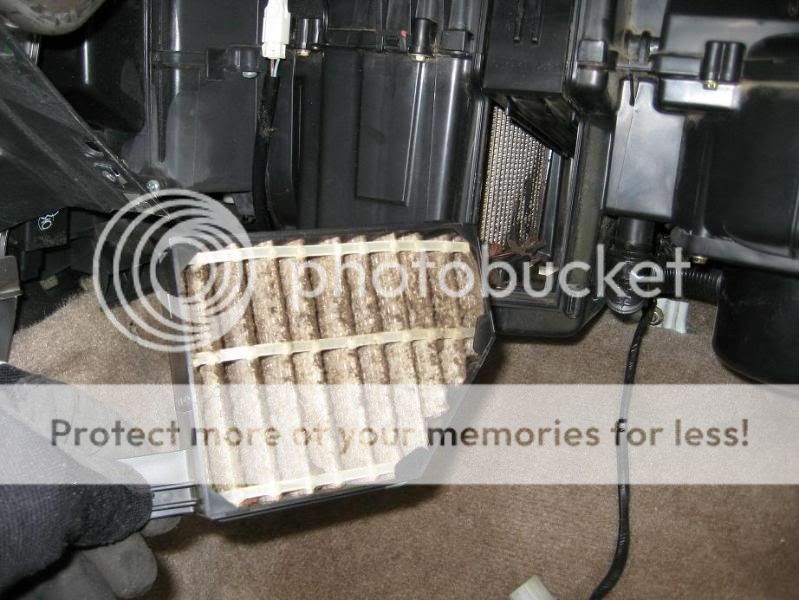
Slide top filter element down a little, then pull it out the same way

Top filter out: Crunch REALLY wonders now how much he paid the dealership to do this, then sneaks glance at gun safe…
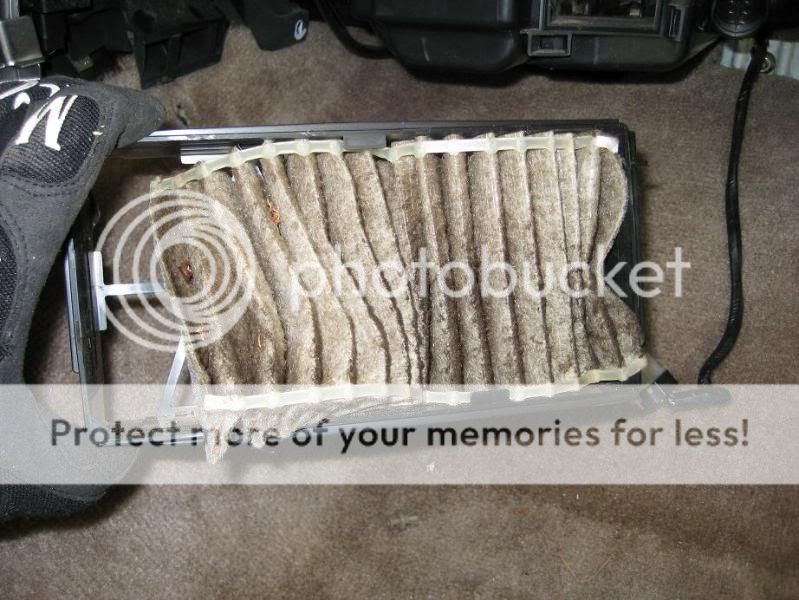
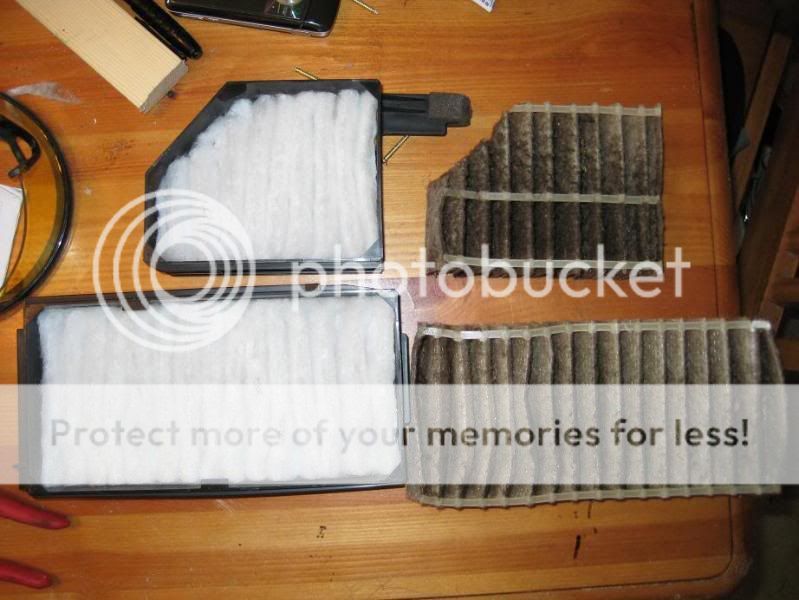
Simply pull out internal filter elements from frame. I thought they would be glued in or something… nope just stuffed in there. Crunch is happy he does not have to build frames from scratch. (makes a side bet that all new OEM filters come with these perfectly re-usable filter frames)
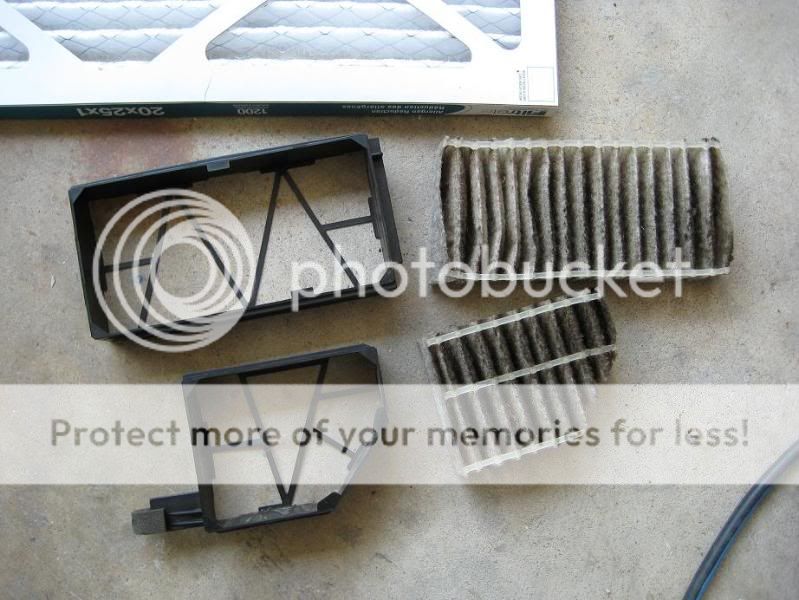
My new filter material. Filtrete 1200 electrostatic household filter 20″x25″x1″ Many filters are the same price but different sizes, I simply picked the filter i wanted then selected the biggest size that did not change the price. This leaves me with extra filter material. I can probably squeeze out 2 more element changes with this single household filter. (Technically makes DIY filter change cost $4 bucks)
After some experimentation cutting the filter element to size, to include:
Sheet metal cutters- The wire mesh slid between the blades, and didn’t cut the fiber element. NoGo
My new favorite toy: the Rotary Tool– The cutoff disk made short work of the wire mesh, then promptly caught up in the fiber, twisted my wrist, and managed to throw itself 15′ across my concrete floor. Luckily not at me. NoGo
Simple pair of household scissors- Should have tried them first, cut easily through the fiber and the wire mesh. WiN
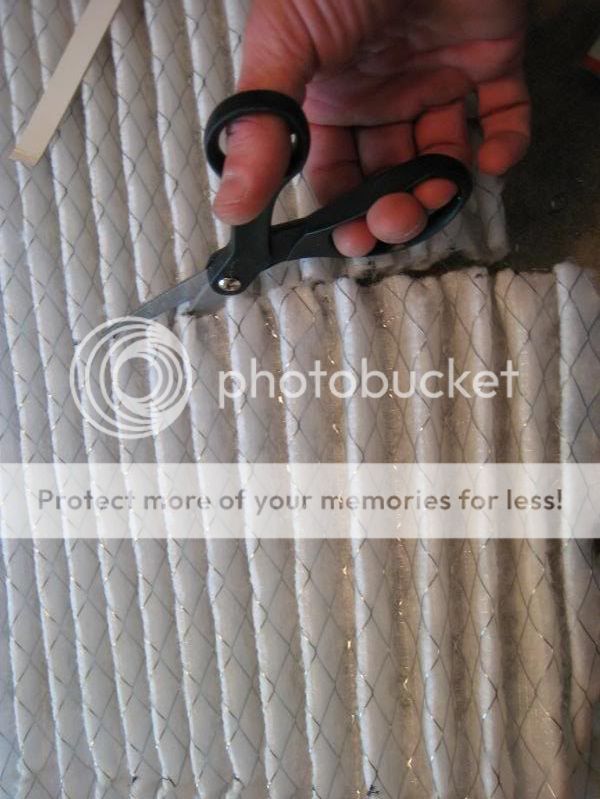
New filter element installed, wire mesh to the rear in proper position. I cut it slightly larger than the frame size, then trimmed it up with the scissors.
To figure out how much I should stuff inside the filter frames, I counted the folds in the old filter and added the exact same number. I then pressed all the folds together to make sharp corners (they are more rounded in the big household filters) Then inserted compressed element into the frame and stretched it to fit.
No glue was necessary, it all fit in securely.
Since you have everything out, and keeping with my belief that you should clean anything you take apart, you might as well add $8 bucks onto the cost (still keeps you under the OEM cost + shipping)
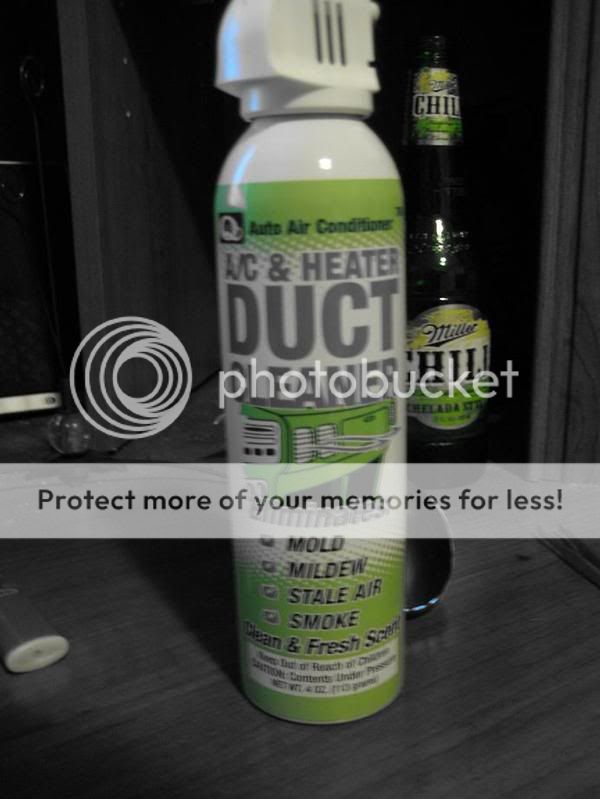
Squirt this stuff throughout your air ducts, follow directions on the bottle.
Just make sure your looking at the right bottle