
 Posted in
  Tags:
Tags: A Rear Strut Replacement DIY for the E110 Eigth Generation (1998-2002) Toyota Corolla
Works For:
1998 Toyota Corolla
1999 Toyota Corolla
2000 Toyota Corolla
2001 Toyota Corolla
2002 Toyota Corolla
Source: ToyotaNation
This is a DIY of rear struts with coil over sleeves . It still can be a DIY with OEM springs , you just omitt the areas for the sleeve .

First you jack your car up and place it on jack stands for safety . As you can see in this photo I do not need a spring compressor but if you are working with OEM springs then you need to use the proper tools which is the spring compressor which you can rent for free at any local auto parts store .

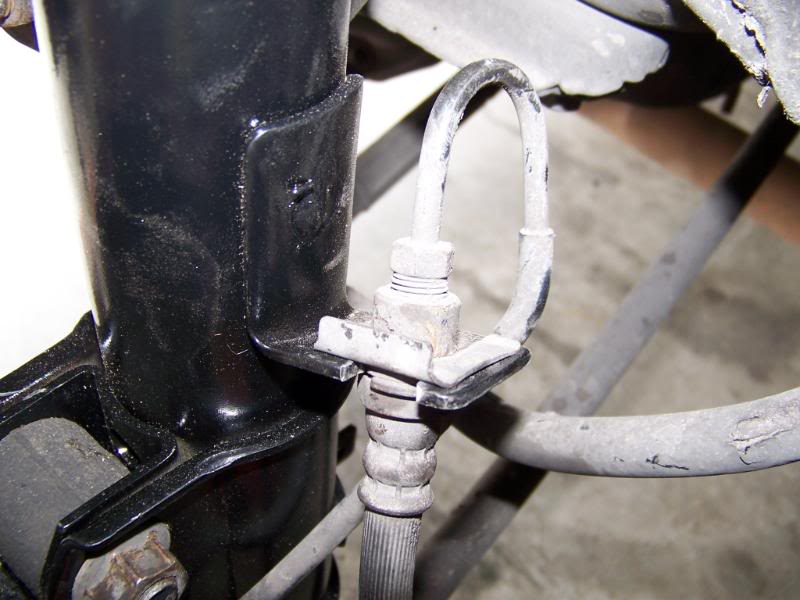
Once you have the car secure you and your spring secure then remove the brake line . Remember to bleed the brake line when you put this back together . If you do not have to unscrew the brake line then you do not have to bleed . There is a clip there to once you unscrew the brake line then with a flat head screw driver you push the clip aside .

Then you remove the rear sway bar link using a wrench and allen key . Make sure when you put this back on you add some anti seize for easier future removal .

Then you loosen the bottom two bolts do not take them fully off . Until you remove the top one after . Loosen this up first because if you take off the top nut then strut will turn while trying to take the bottom bolts off . When you put the bolts back on use anti seize .
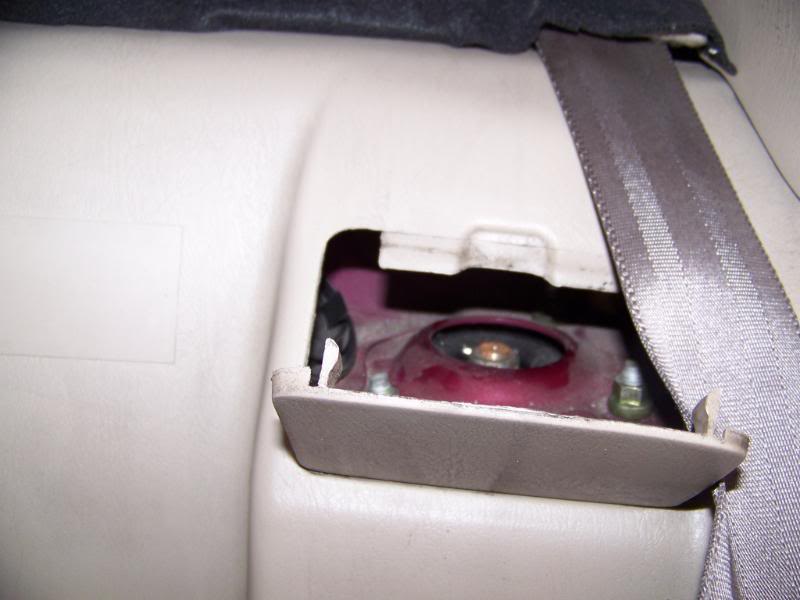

Then if your vehicle has the back seats that come down then you pull down your back seat . If your vehicle back seat doesnt come down then you have to remove the back part . Once you pull your back seat down you will see a flap as shown in the photo , Pull the flap towards you then unscrew the top nut . Again when you put this back on use anti seize .

Once you have them off make sure you have the correct side . The rear struts are the only struts on the car that have a left or a right .

Now this part is only for those who have coil over sleeves and the sleeve will not fit over the strut shaft because of a obstruction of the top part . This will not void your warranty unless your dum enough to tell them what you did .

Now with your drill you drill out the three weld marks . Leaving the clip still on the strut to help you out for needed stress . You do not drill all the way . All you are doing is basicailly removing the weld spot not drilling through the strut shaft .


You can drill a little and tap with the a hammer and keep doing this until you see the clip lifting up that flat piece , and as shown in this photo your piece will come off .

Now if in the future if you do not want to open the brake lines you can cut out a piece on the strut as shown in the photo so that you can slide it in and out . This is so much easier
Once you d
o that then you can put your brake line back and put the clip back so it can hold it there . If you opened up your brake line do not forget to bleed your brakes .

Then once everything is back on this is what you should have . If you still have your OEM springs make sure you use your spring compressor tool .
| This image has been resized. Click this bar to view the full image. |

Then you put the wheel back on make sure you tighten your lugs nuts .
More DIY : http://rinconrolla98.blogspot.com