Source: AudiForums
Due to the massive amounts of PM’s and threads about the issue i took the time to write up a simple DIY. If one of the moderators wants to put this in the DIY section, be my guest.
Ok, your engine sounds like a diesel engine and you know sludge isn’t the issue, so the tensioner is the next step.
The first thing you wanna do is set the engine at TDC andremove the valve cover. (if you don’t know how to do this you shouldn’t be changing the tensioner)
Once the valve cover is off you need to install the special tool to compress the existing tensioner that comes with the new tensioner that you have already purchased. (pic below)
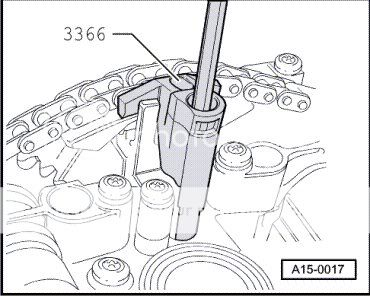
Once the tensioner is compressed, its time to un-bolt the cam shafts. Release the caps in a criss cross pattern starting from the center caps and work your way outwards. Pay attention to where the caps are, there are arrows on the caps that need to be installed exactly where they were before you took them off. Once the caps are off, un-bolt the tensioner. The caps are numbered starting from 5 down to 2, front to back. Just make sure they get put in the same place they were before. The pic below shows how they are supposed to go.
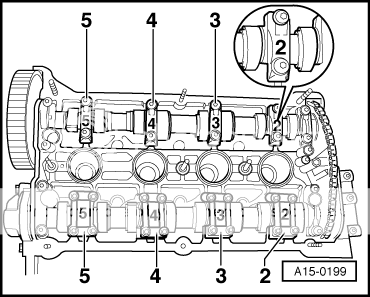
Now, the timing belt is still on the cam shaft sprocket, the hard way to do this job would be removing the front end and taking the timing belt off the sprocket. If you have a brain you don’t want to do this, find yourself a channel lock and clamp the belt to the sprocket so it won’t go anywhere, it won’t jump timing. Trust me. 
Pull the cams and tensioner up as high as the belt will let you and slide the tensioner out.
Remove the tool and compress the new tensioner back down. Getting the new tensioner in is bar none the hardest part of the job. You have to get 16 chain links between the timing marks on the back cam caps in order for the cams to be in time. The pics below tells the tale.
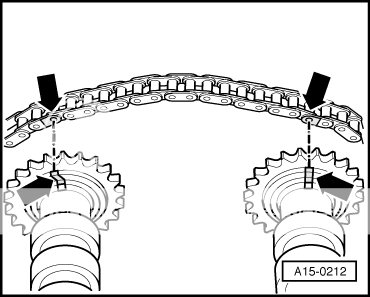
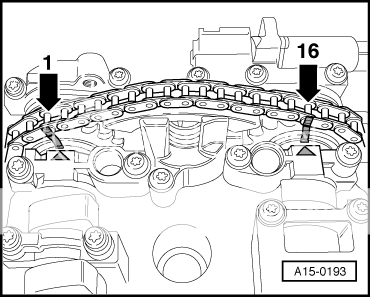
This step is optional, if you want to change your cam adjuster seal while your in there, its really easy to do with the tensioner out. The seal consists of a half moon seal, and a flat seal. It sits directly under the tensioner as in the pic below. Of course install this before you put the tensioner back in.
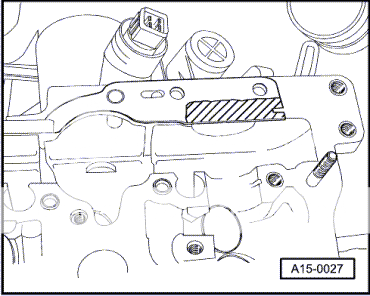
If you got the tensioner back in and you can count the 16 chain links between the timing marks your golden to put the cams back in.
When bolting in the cam caps do everything by hand, starting from the inside working your way outwards again using a criss cross pattern. Do this about 3 times lightly in the same pattern until the cam caps are flush with the head. NOTE: The cam caps do not require much torque, exceeding this torque can crack the cam caps. I have done this and its not a pleasant part to find.
Install everything in reverse order. The torque specs are listed below if needed.
Component
Nm
Bearing caps to cylinder head
10
Camshaft adjuster to cylinder head
10
Camshaft position sensor rotor ring to camshaft
25
Camshaft position sensor housing to cylinder head
10
Camshaft sprocket to camshaft
65


 Posted in
  Tags:
Tags: