Source: DIYMyHonda
Introduction:
Time for another DIY. This one has been floating out there for some time now, but I haven’t had the time to get it all together. You’ll want to do this DIY if you have aftermarket speakers that don’t fit with the stock trunk springs. After removing the stock trunk springs you’ll find that the trunk won’t open lightly as it did before. The solution? Trunk shocks!
Flip Flop Trunk:
Oh yeah, the flip flop trunk DIY can be done in conjunction with this one. They will work together. However, the weight will shift around differently when the trunk is opening, so the trunk shocks may be able to open the trunk all the way. It is unknown whether that happens though, I’m just guessing…
Parts: (McMaster.com)
9512K73 – You’ll need two of these. They’re little ball studs.
9512K91 – You’ll need two of these as well. They’re mounting brackets with ball studs.
9416K74 – You’ll need four of these. They’re little ball sockets. One for each end of shock.
9416K16 – You’ll need two of these. The gas shocks. Select 40 for the force. This is in pounds.
2521A622 – Tap for making threads in the hole you will drill.
90197A146 – Pack of a 100 zinc-plated self-piercing screws.
Total Cost: $39.56
Note: The force is a guess. Mine are only 15 pound ones, but I do have those trunk springs as well. If you’re thinking of making new trunk springs as well, then I’de choose 20lbs. If not, then 40lbs. Although if you have a spoiler, or are thinking about a spoiler, then maybe 50 pounds would be better.
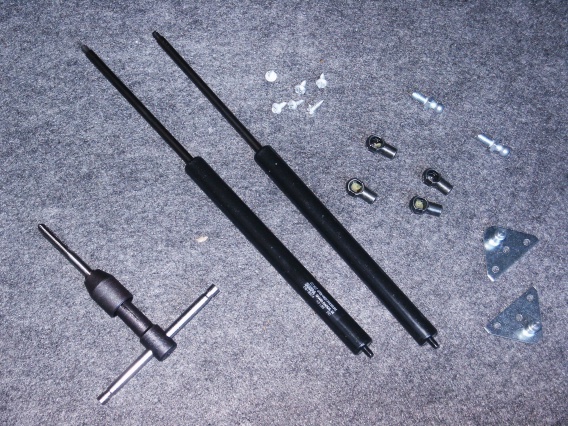
Note: You will not need this tap wrench. It will not reach into the place we need. We will mount the tap onto a drill instead.
Tools:
A drill. (cordless works if it’s powerful enough)
Drill bits. (one bigger one and one smaller one)
Socket set. (small socket sizes are crucial)
Wrench. (to reach into tigh spots, deep socket would work too)
Rope. (nylon rope works, to hold up the trunk)
Instructions:
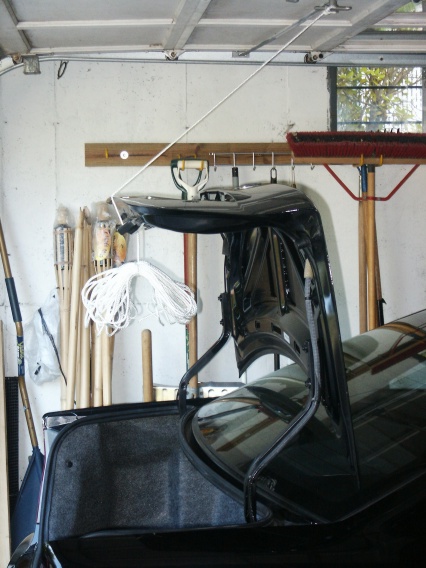
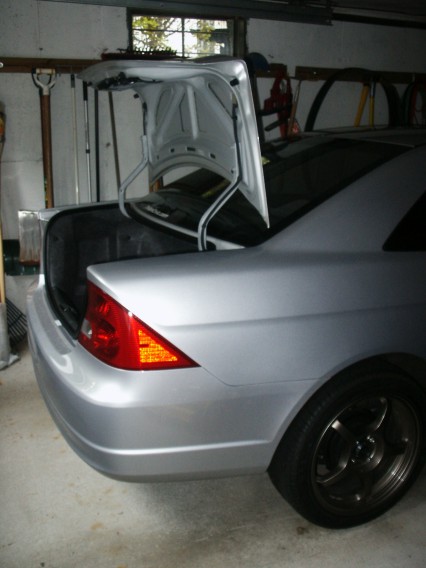
First you’ll want to take out all of the crap in your trunk and secure the trunk to stay open somehow. If you have a garage, then you can secure it to something on the ceiling as in this picture. However you do it make sure it’s secure. You don’t want the trunk falling on you!
Now, the trunk shocks will come extented. If you bought the 40 pound ones, then they will be hard to push in. You have to figure out where to mount them. Just use one simple rule. The extended length must open the trunk all the way. The collapsed length must fit when the trunk is closed all the way. If you follow that rule then you’ll get something like this…
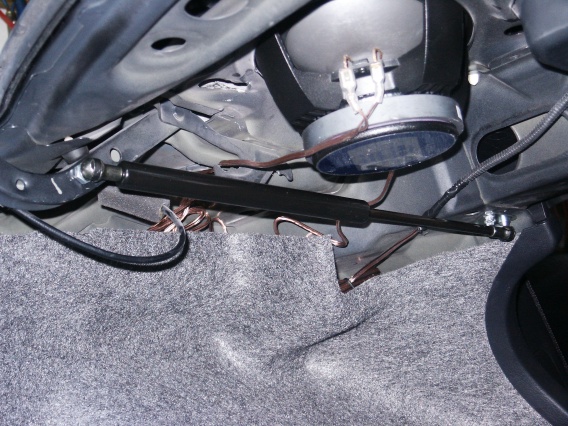
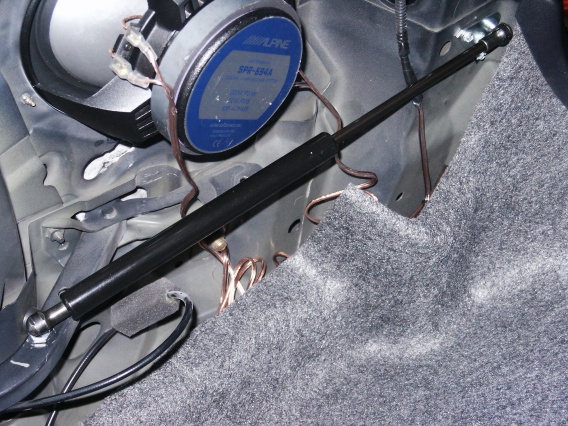
You will want to drill pilot holes for the bracket mounting screws. Even though they are self piercing, pilot holes will help them go in. Just remember to drill out a smaller diameter than the screw itself, or you won’t be able to screw it in. Duh!
Assemble the trunk shocks by screwing on the ball sockets. The ball sockets are already greased up from the inside. You want the thicker part of the trunk shock to be towards the trunk opening (exactly like it is in the picture). This allows for more clearance when the trunk is opened up all the way.
When drilling out the holes for the ball studs you’ll want to choose a smaller diameter drill bit than the diameter of the threaded portion of the ball stud. Ideally it should be exactly the same size as the non-threaded portion. If it is a larger diameter, then the ball stud will not be very secure after you thread the hole. If it is a smaller diameter then you will have trouble threading the hole.
Now, secure the tap in the drill. Set the drill to its lowest speed. A variable speed drill is ideal. Dip the tap into some cutting oil; motor oil works, but so does just about any oil out there. Drill the tap into the hole a little bit and then back it out. Keep doing that until you are able to get the whole tap in. You may want to wipe the tap with a rag from time to time to get rid of the shards of metal.
You’re basically done! Snap everything into place and test out your new trunk shocks. If you can’t get the trunk to close properly, then you messed up when you were measuring. Only do this DIY after you have measured everything out and you are sure that the trunk will open and close all the way. Actually, if you’re positive that you measured everything correctly and the trunk still doesn’t close properly, then you may want to adjust the trunk latch and/or the rubber bump stops.
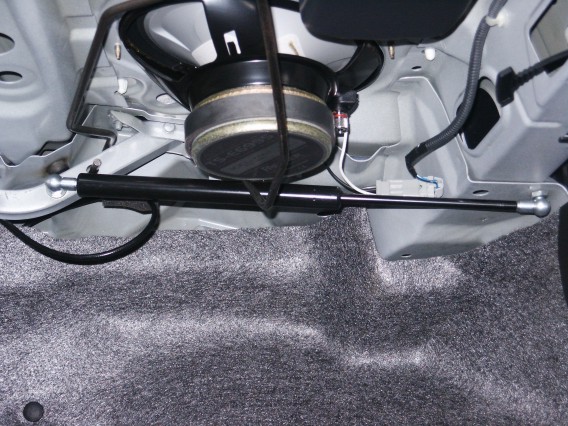
Note that my setup is slightly different. No bracket. 15 pound shocks. Deeper trunk springs.
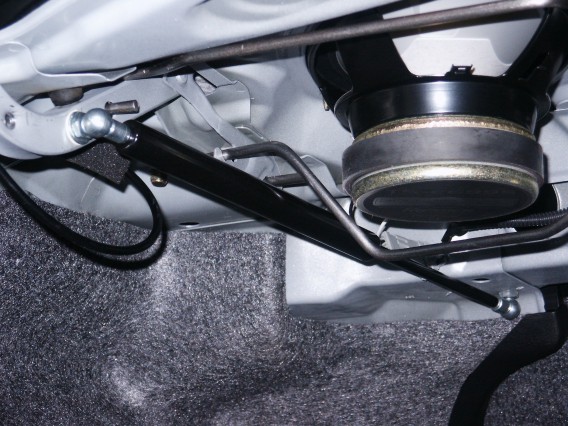
I don’t use a threaded hole for the ball stud either. I messed up by trying to thread in the ball studs without using a tap on the hole. Whoops! I had to use these threaded rivets that go into the hole and clamp down on the edges of the hole.
At first I had a different pivot point. The stock hole which can be seen in the previous picture. I changed the position and now the trunk opens up all the way. Joy!


 Posted in
  Tags:
Tags: