
 Posted in
  Tags:
Tags: Replace the Clutch on a Fiat Multipla
Works For:
1998, 1999, 2000, 2001, 2002, 2003, 2004, 2005, 2006, 2007, 2008, 2009, 2010, 2011, 2012 Fiat Mulipla Models
Source: FiatForum
Tried to put this guide on a few times,wasted a lot of time has it would not post.So this is my last go at it,thought i would try it in stages this time instead of one long thread,see if that helps.Call this part 0ne.
 This is my guide to fitting a clutch on the fiat multipla 1.9JTD, i did this on my garden on axle stands.So anyone who can not afford to pay someone to do the job ,you can do it.Just give yourself 2-3 days,and dont rush it,giving the nuts and bolts thats you will be undoing blast of wd40 for a few days before might also help.
I have learnt the hard way and ended up doing my clutch and droping the gearbox 3 times ,with this guide you wont have to.I found the cd workshop manuals very poor,hope this helps somebody.
Part one
First step is to losen both front wheels nuts,then jack up front of the car and place on axle stands,and take both wheels off.You will be dropping the subframe,so bear this in mind when when you place the axle stands under car.The higher higher you can get the car,the better it will be for you,thats where good axle stands and trolly jack come in.Also dont forget to stick bricks or wooden blocks under back wheels before jacking up.
Remove the plastic wheel arch from under the n/s front wheel arch.There are a few plastic button studs which you can prize out with a screwdriver.I used 2 screwdrivers one either side to pop them out,just go easy so you dont damage them.Also there are a few screws and a nut and wire which you need to undo,before you can drop it out.
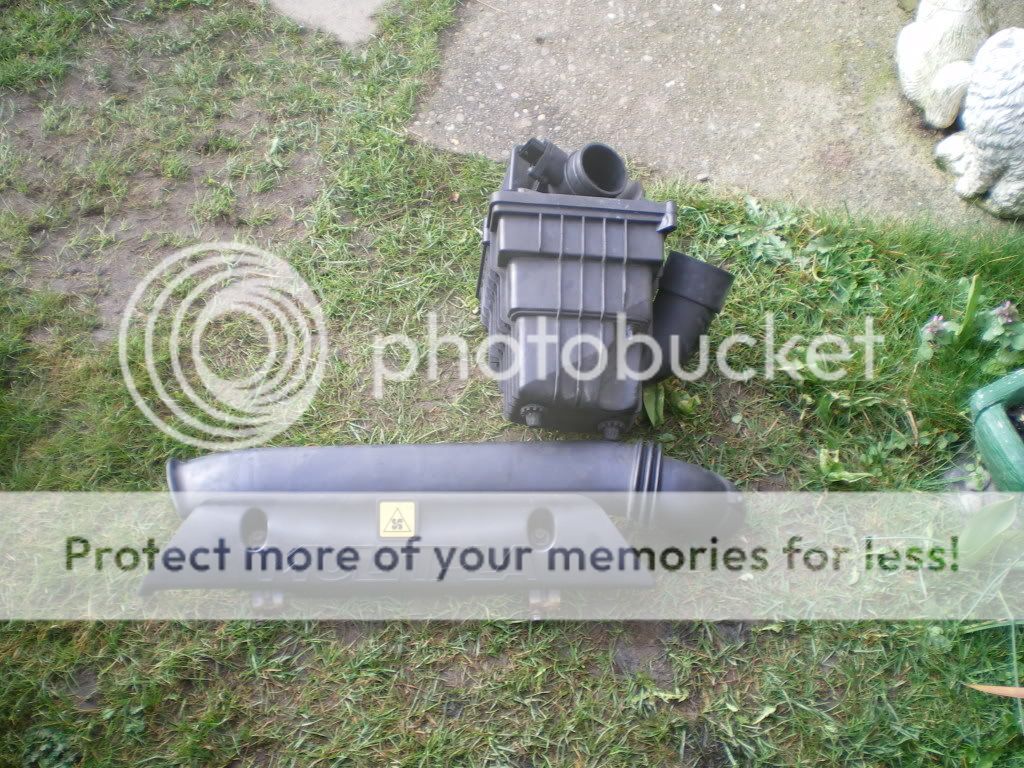
Remove the battery,then the air filter needs to come out.
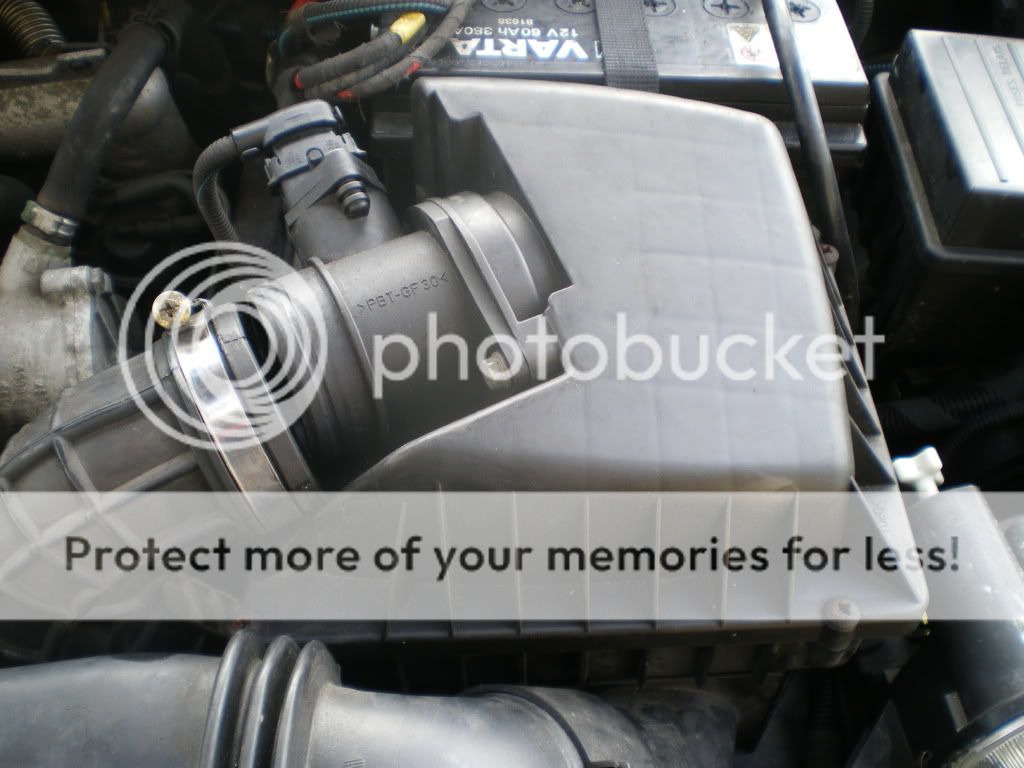
Undo the the airbox jublie clip to air intake pipe,then you can undo the two 10mm bolts at front of car holding air intake,now remove.

Then undo the airflow sensor clip at top of air box,now remove air box too.
Next you need to remove the battery tray,which i found was a pain.I had a lot of trouble with the top front bolt on mine,plenty of wd40.You have 2 top bolts front and rear,another one at top holding bracket that holds wires,then 2 under the tray if i am right.You will be glad when tray comes off.
Down on the n/s front corner of car is the inter-cooler,remove both rubber pipes,there will be clips on top pipe which holds some of the cars wiring which you need to undo.
Part 2
Undo the 2 bolts which hold the clutch slave on top of the gearbox,you would of seen it when you removed battery tray,has it sits under it.Place it to the side of the car out of the way.
At the back of the clutch slave you will see the gearbox gearchange cables,i took these off has a whole unit and left them hanging.
They cost a lot to replace if you damage them,you just need to pull one cable off to do this,good set of long pliers on the ball not the cable.Then undo the middle shaft holding it all,dont lose the small rubber seal either side of the shaft.Now you are ready for the 3 bracket bolts,the front side top bolt is alittle tricky,always replace this one first otherwise you will struggle,ask me how i know.Now just pull back the lever rubber boot,so you can release the lever off gearbox.
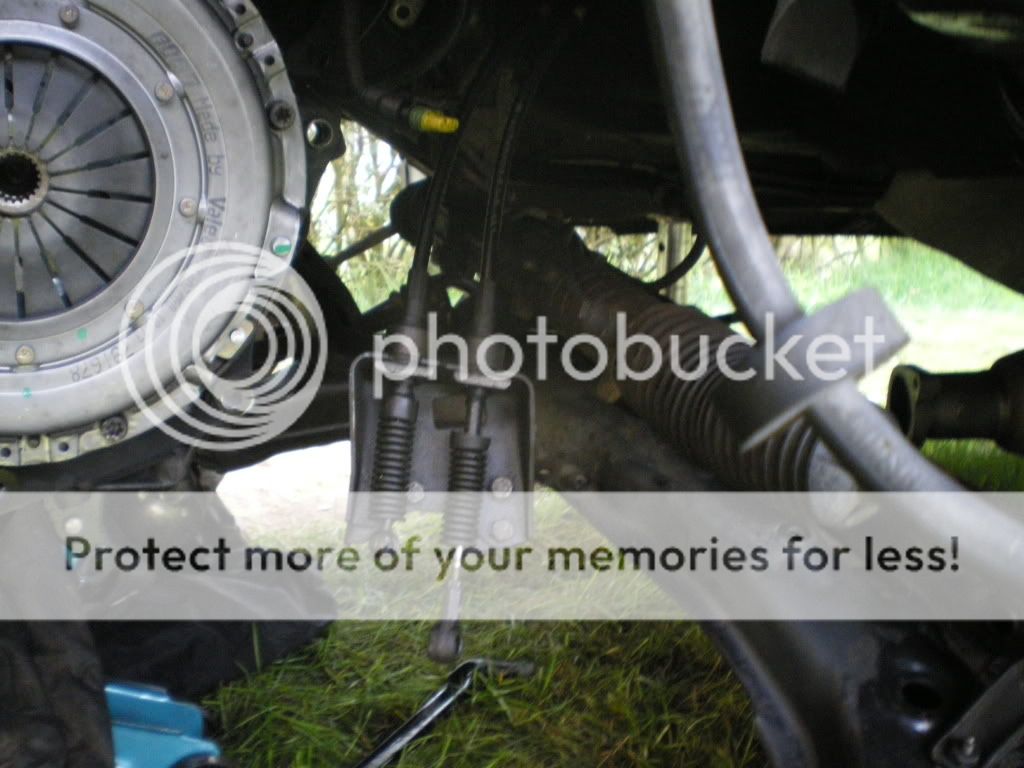
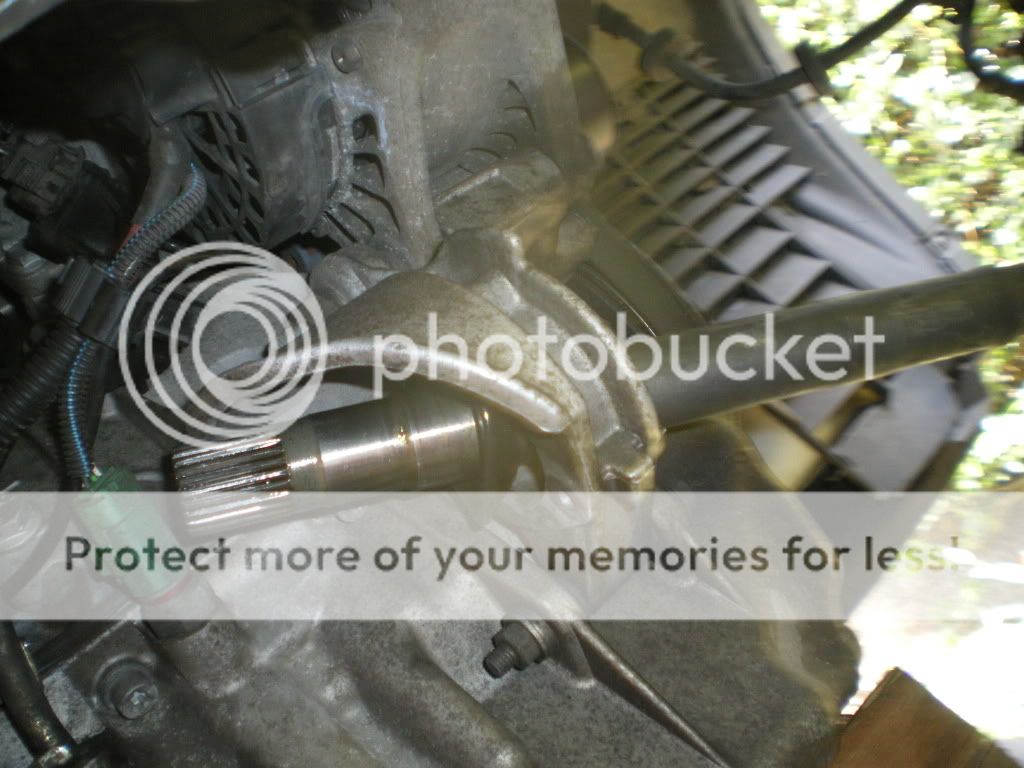
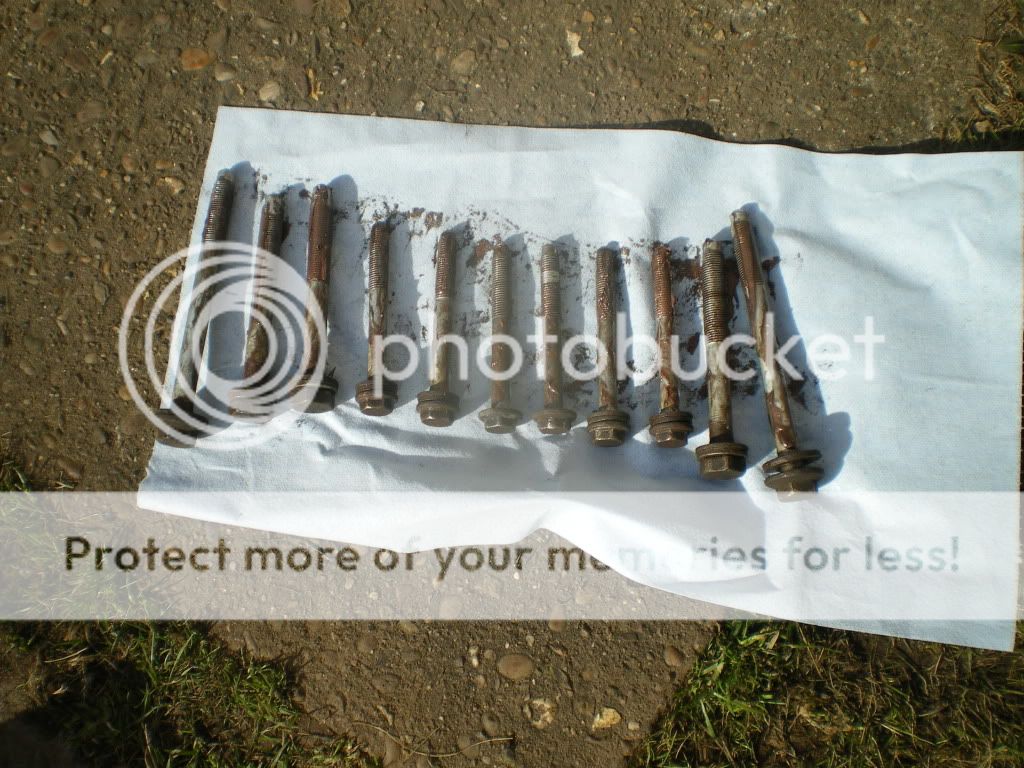
Now undo the drop links at the anti roll bar on both sides,and undo the wishbone knuckle bolt and nut on both sides too.Working on n/s undo the driveshaft bolts,be carefull that the hex bit fits proper or you will damage the bolt end and it will be a pain to undo.Ask me how i know.Now do the same on the other side,then drain the gearbox oil,good time to replace with fresh oil when you put it back.
Now oil is drained you can remove the arm which goes into o/s gearbox driven from the o/s driveshaft.You will see 3 x 10mm bolts which you need to undo.Then you can knock it out towards o/s with a rubber malet,make sure o/s driveshaft is out the way.
Now remove the downpipe which goes under the subframe,3 front nuts and 2 rear.One of my front nuts was soild and i had to carefully cut it off with dremel type tool.All nuts were replaced with s/steel ones,i also kept he old 2 metal gaskets and re-fitted them with some exhaust sealant on.
Now the fun part, removing the starter motor.Remove cables,13mm nut holding thick cables and 10mm nut holding the thin cable,dont lose the washers.The live red cable will have a tidy clip at rear which you must undo so you can move cables out the way.Now undo the 3 bolts holding the starter motor to the bellhousing,good luck with the back bolt,takes alittle time,short subby spanner i found best,think they are 13mm.
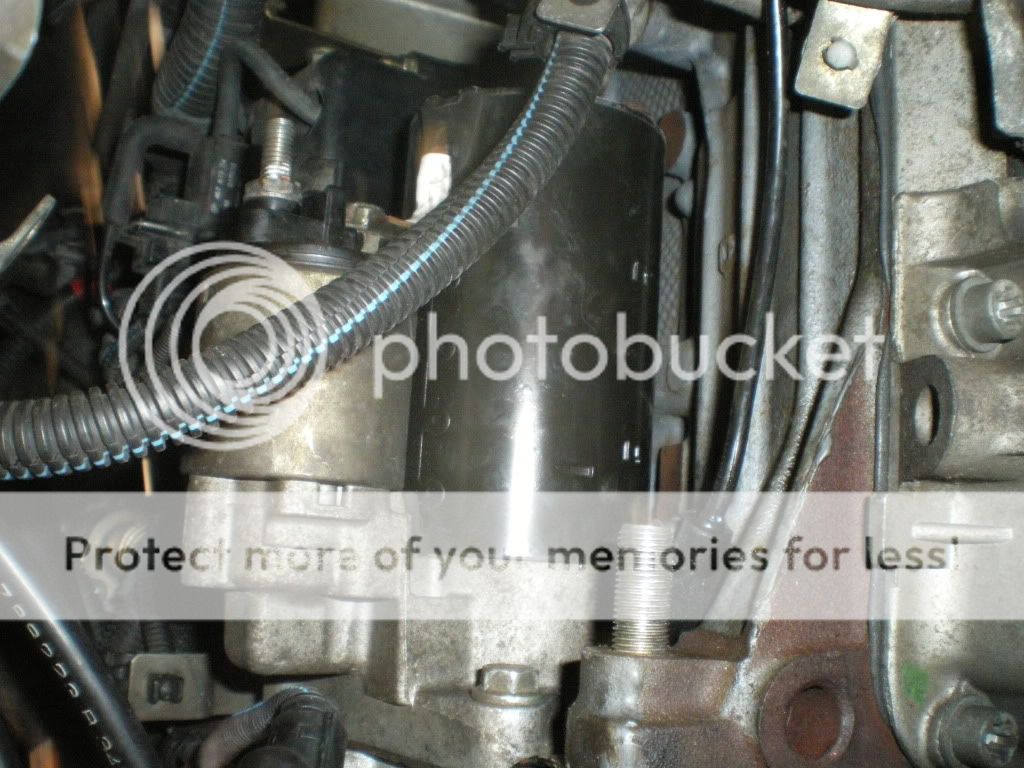
When you undo the 3 bolts the top 2 also hold a bracket for cables,so you know how it fits back.Now remove starter motor.Why you are there undo back electic socket
Green one too left of photo
And also front one

PART 3
Now it is time to drop the sub frame,i tried to do it without dropping it the first time,but you need to move gearbox out to clear bellhousing stud.
It was so hard and not much room,so i dropped the subframe on the n/s only to get extra clearance.
It was a lot better like this,but fitting the o/s wishbone was a pain ,so i dropped the whole subframe with both wishbones.
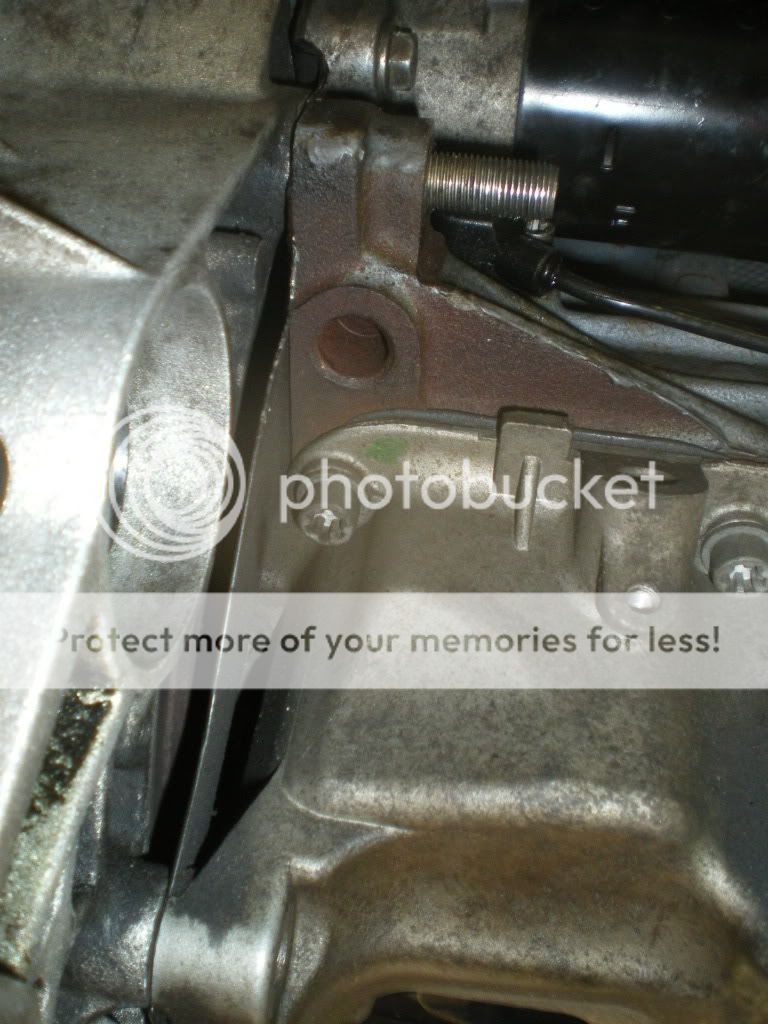
There is a engine/gearbox rear surpport.
First time i removed it first,then the subframe,you must surpport the engine with a jack before you remove it.The last time i removed subframe whole with bracket on,but found it harder to put subframe back on.I would remove mount then the subframe.Bolts holding subframe.
Get yourself a long breaker bar,make life easy.
PART 4
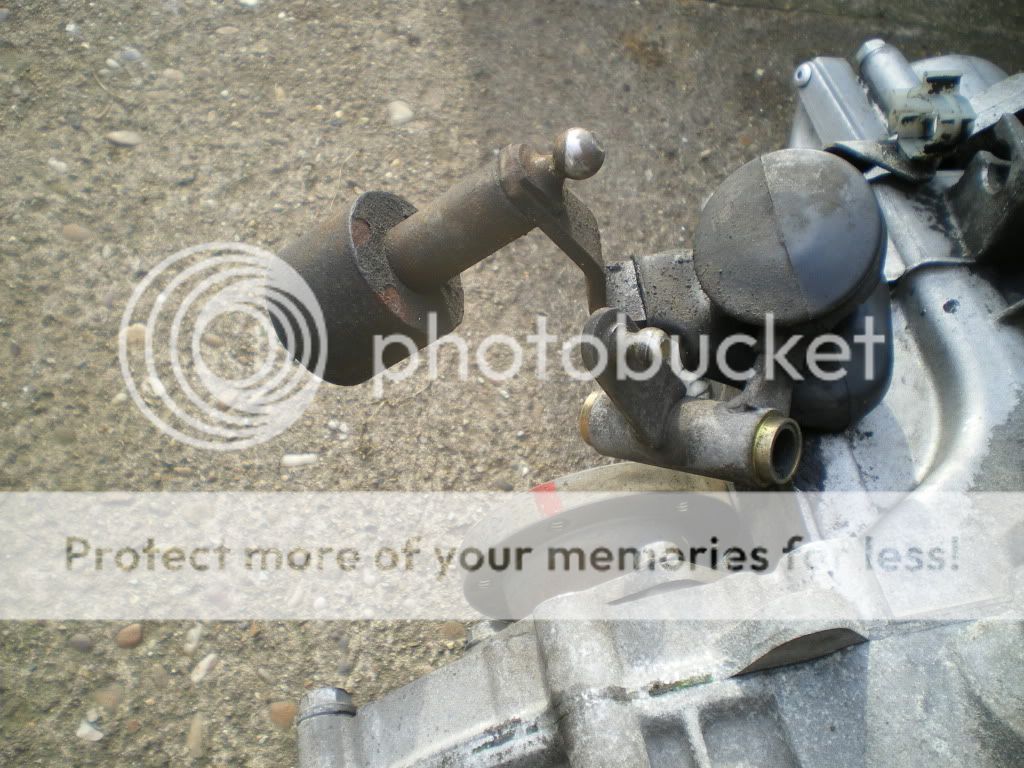
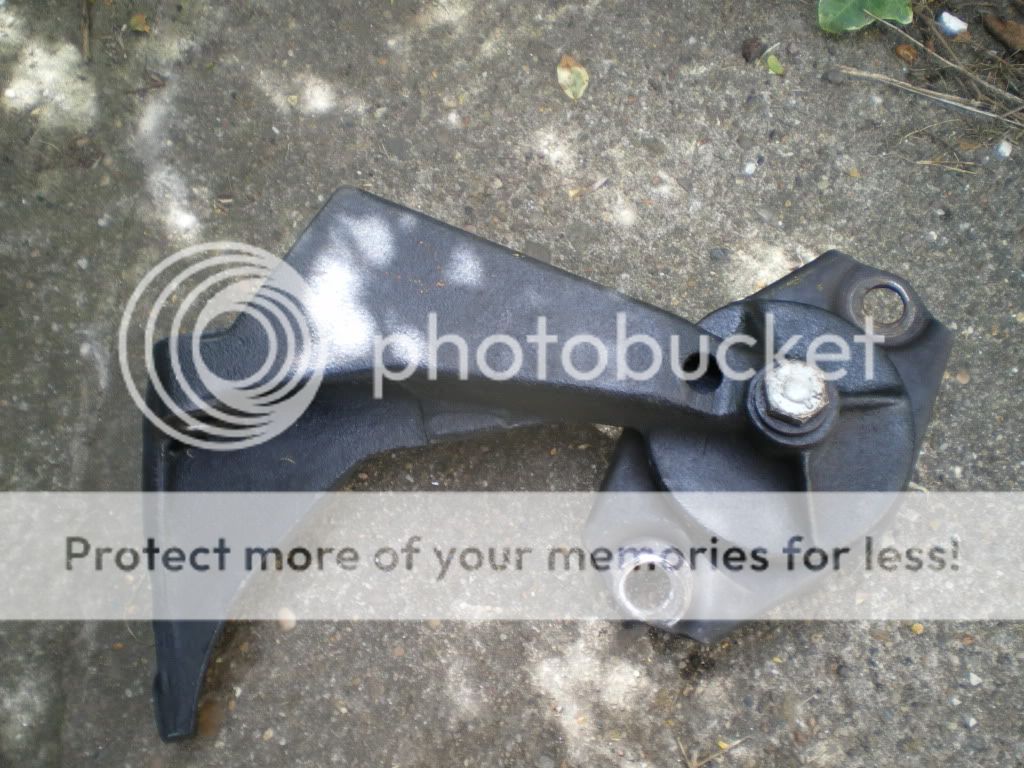
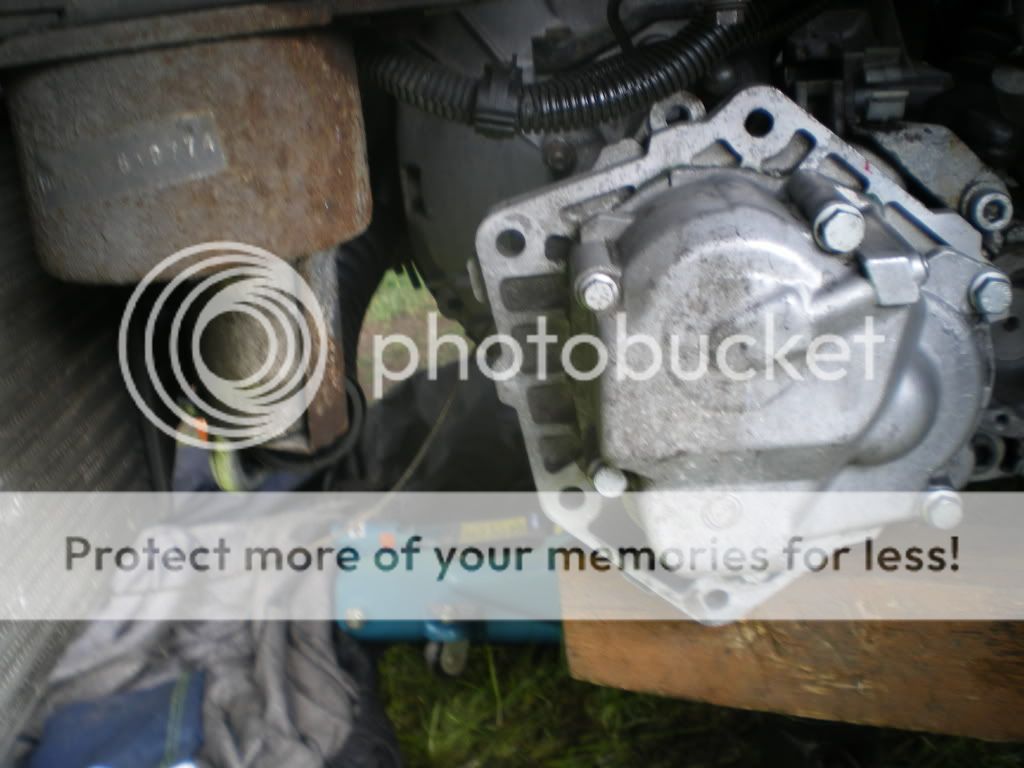
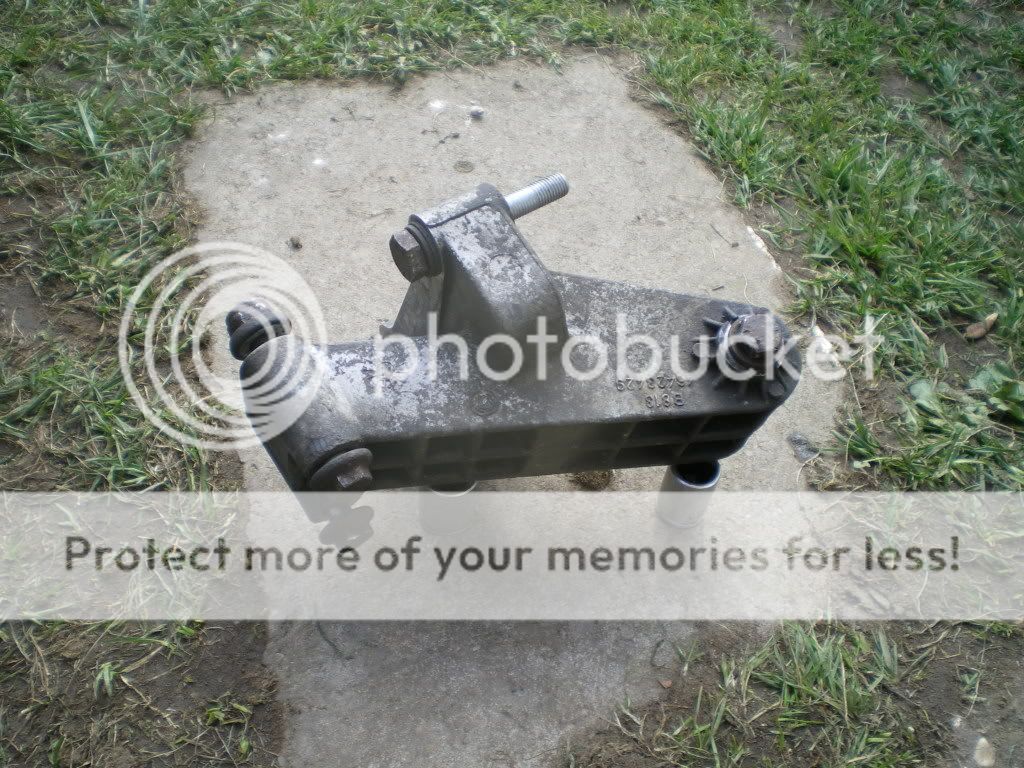
Now remove the gearbox front surpport,again you must surpport the gearbox with a proper surpport or jack.I used a jack the first time,but the last time brought a proper engine/gearbox surpport off ebay for £45.

I had no help to remove gearbox,and this makes it a one man job.Photo of front mount.
And with it removed.
Moving the front mount gives you more room to play with,and it stops you hitting your inter-cooler when dropping gearbox.Now you need to make sure that all cables ect are out the way,and that the gearbox has room to come out.If ok undo bellhousing bolts,not forgeting nut that holds earth strap to gearbox,and prize gearbox open.A crow-bar or very large screwdriver helps to lever around bellhousing.
If you dont have a surpport for gearbox,i used a sturdy length of wood across engine bay and some rope first time.If you have a helper all the better,get someone to hold rope and surpport gearbox from above,and you can lever it out and surpport from below.
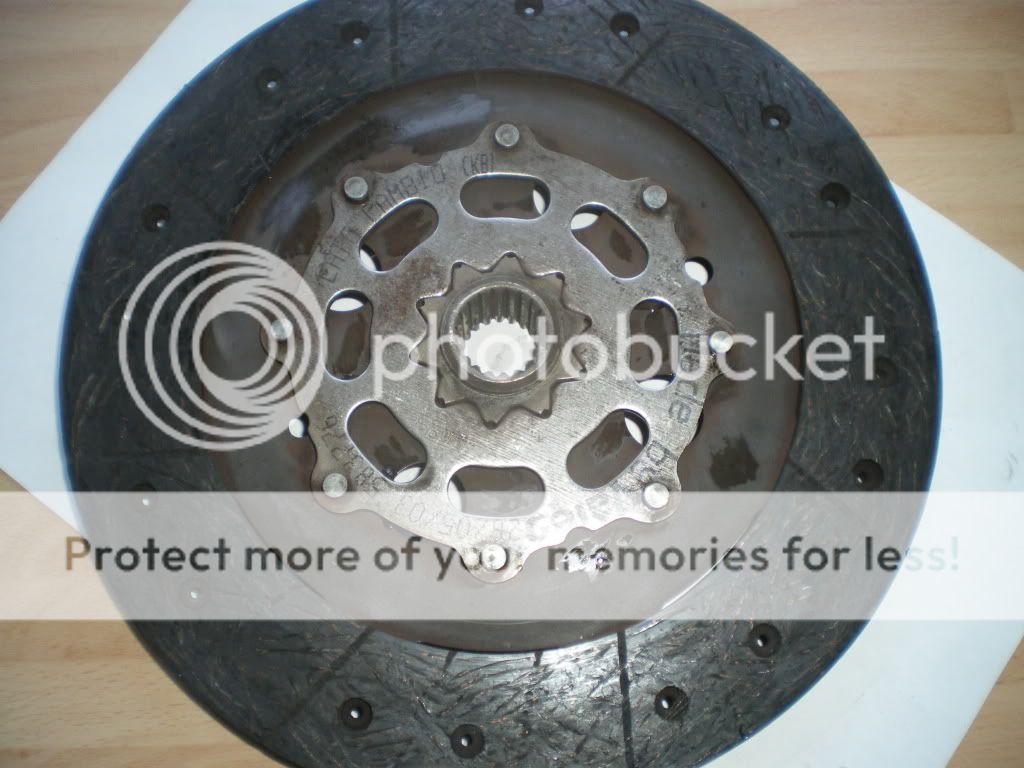
Gearbox out now you can undo the pressure plate bolts.
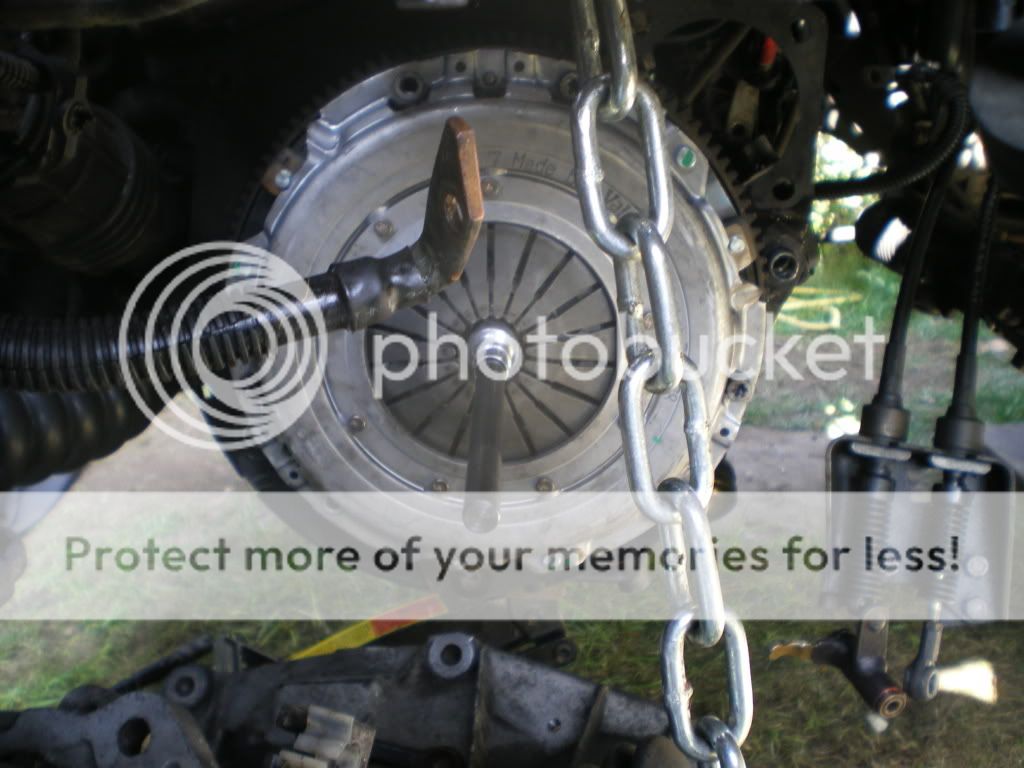
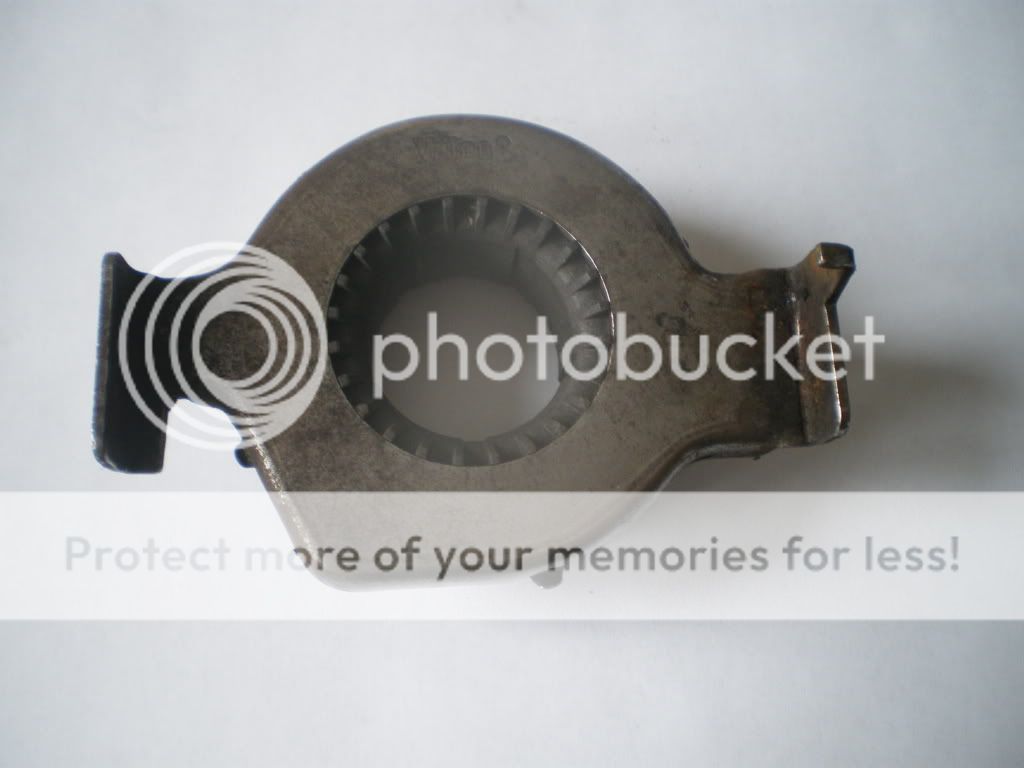
You may need to lock the flywheel or put it in gear if any bolts are tight,i moved the gearbox lever and put it in gear.
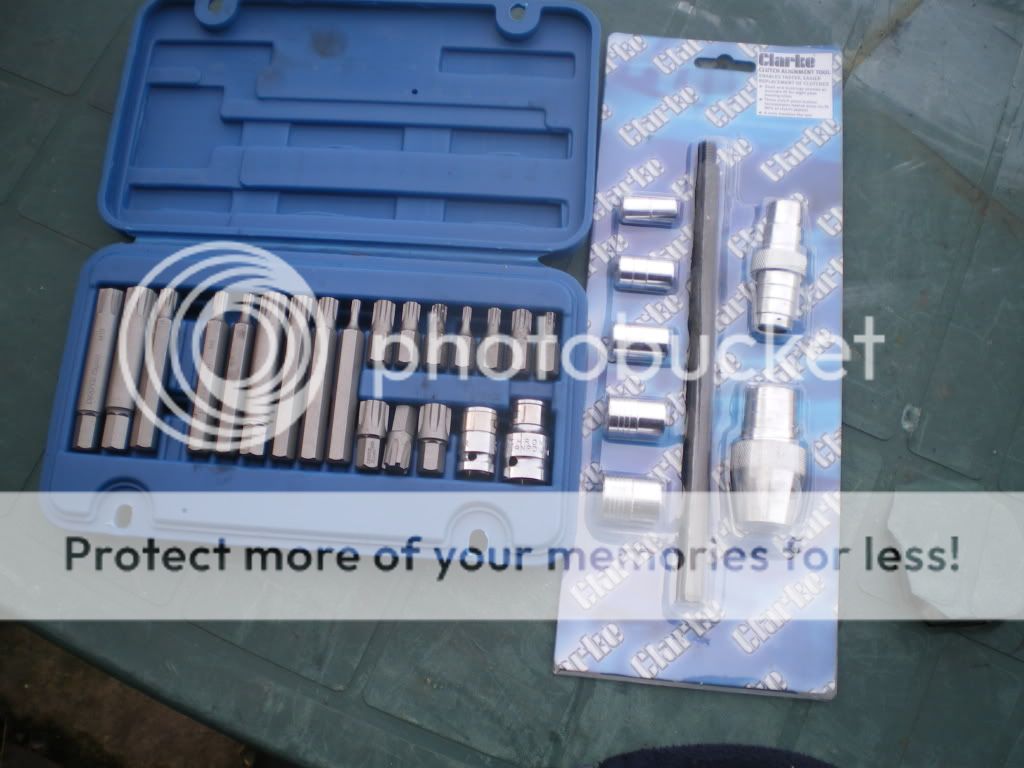
You will need these to undo bolts and align new clutch.
Now you can replace the clutch using the align tool,just make sure this side faces gearbox,ask me way and 3 goes latter.
PART 5
Now make sure you order a gearbox output shaft seal,and the o/s gearbox driveshaft seal,for the sake of £13 you dont wont to be stripping it again.
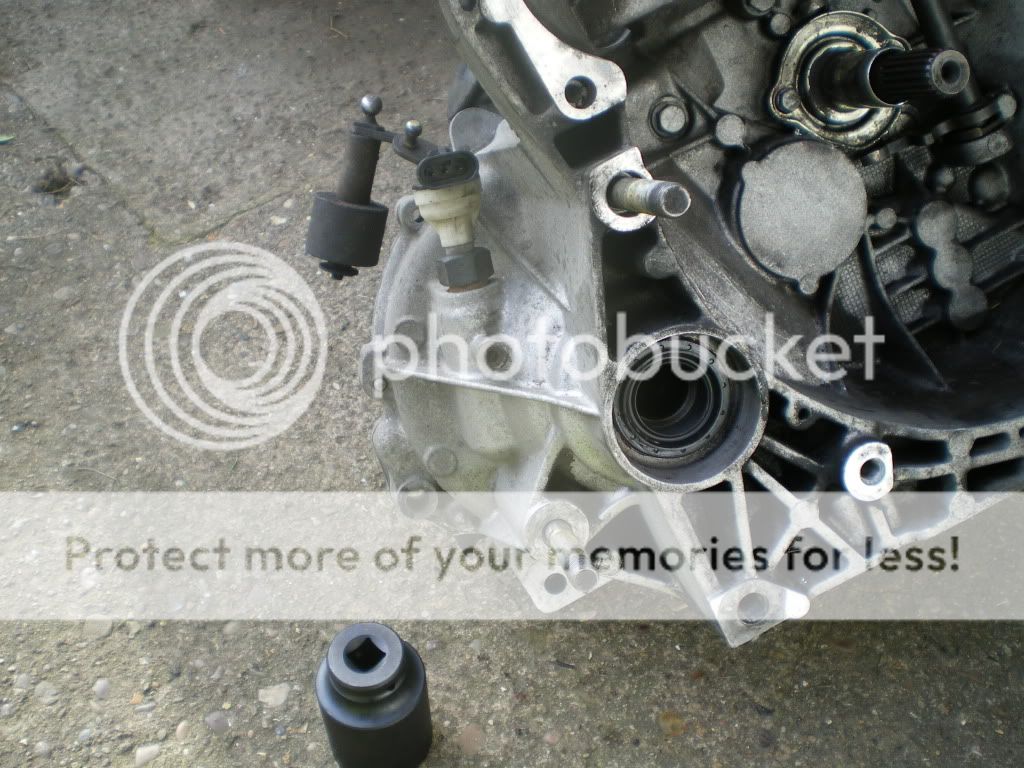
Remove the holder,2 bolts.
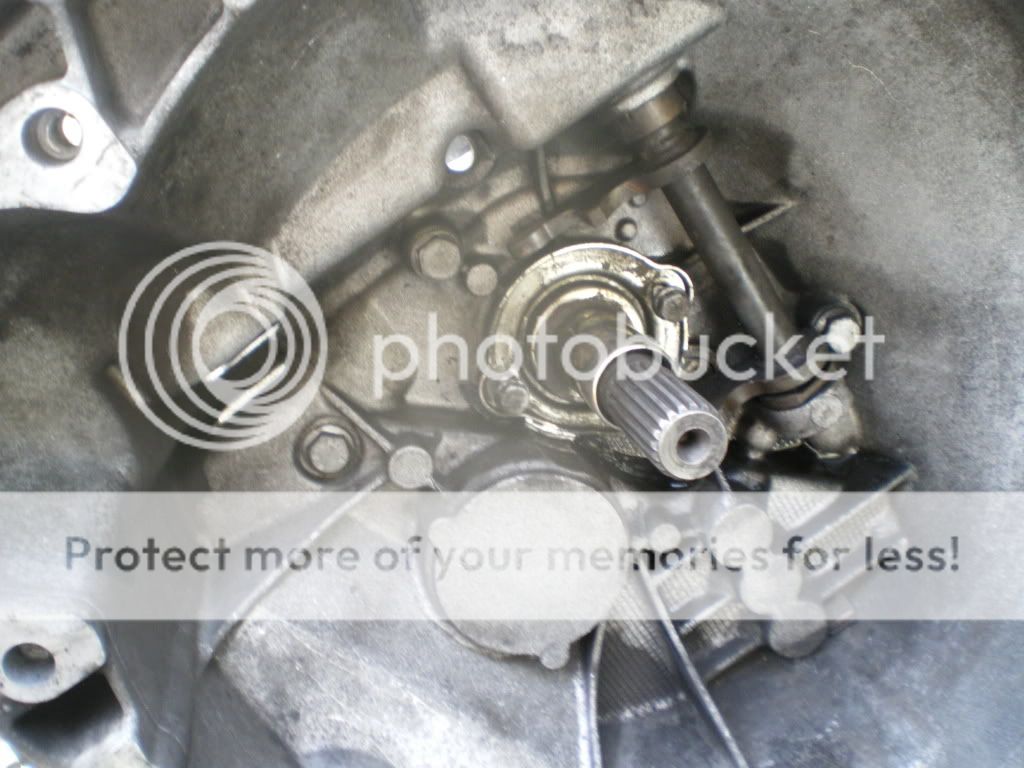
Then prize the seal off the holder with some grips
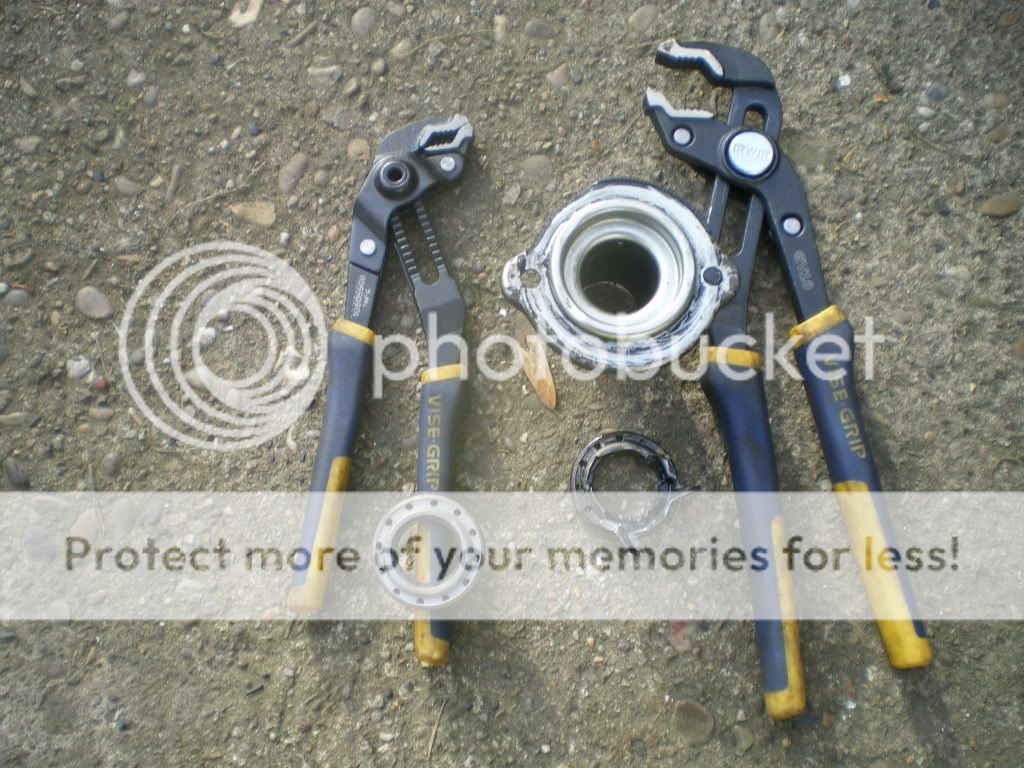
Knock the new seal on with right size socket and a rubber malet

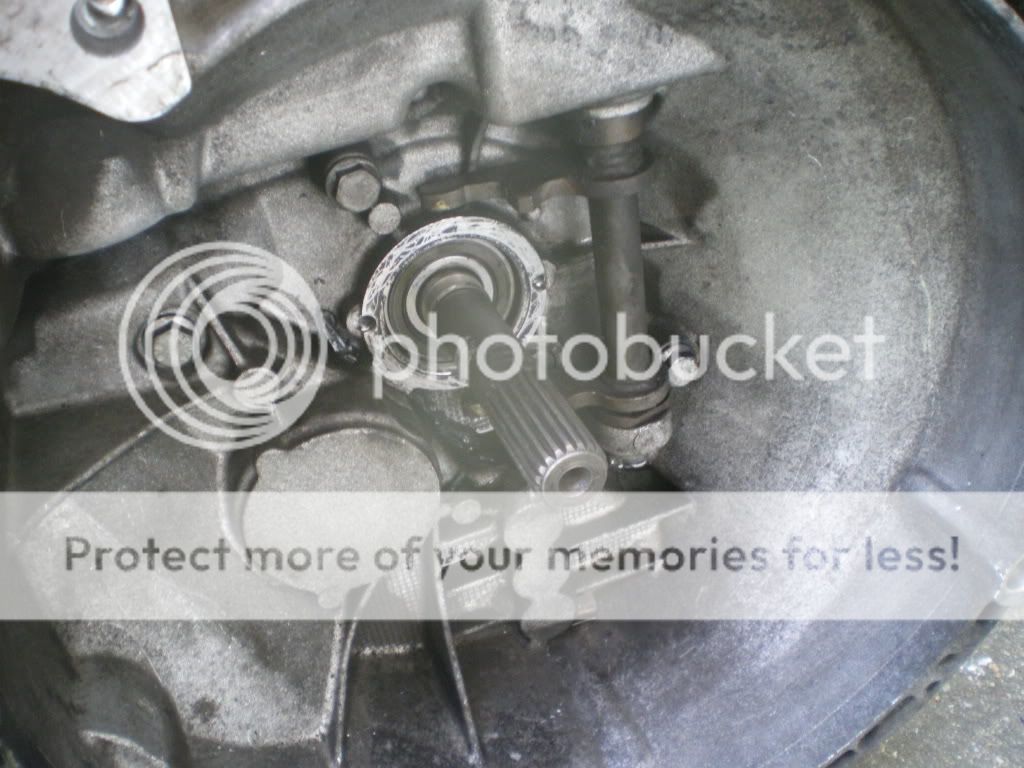
Seal the end and replace bearing holder onto input shaft
Now prize the gearbox o/s driveshaft seal out
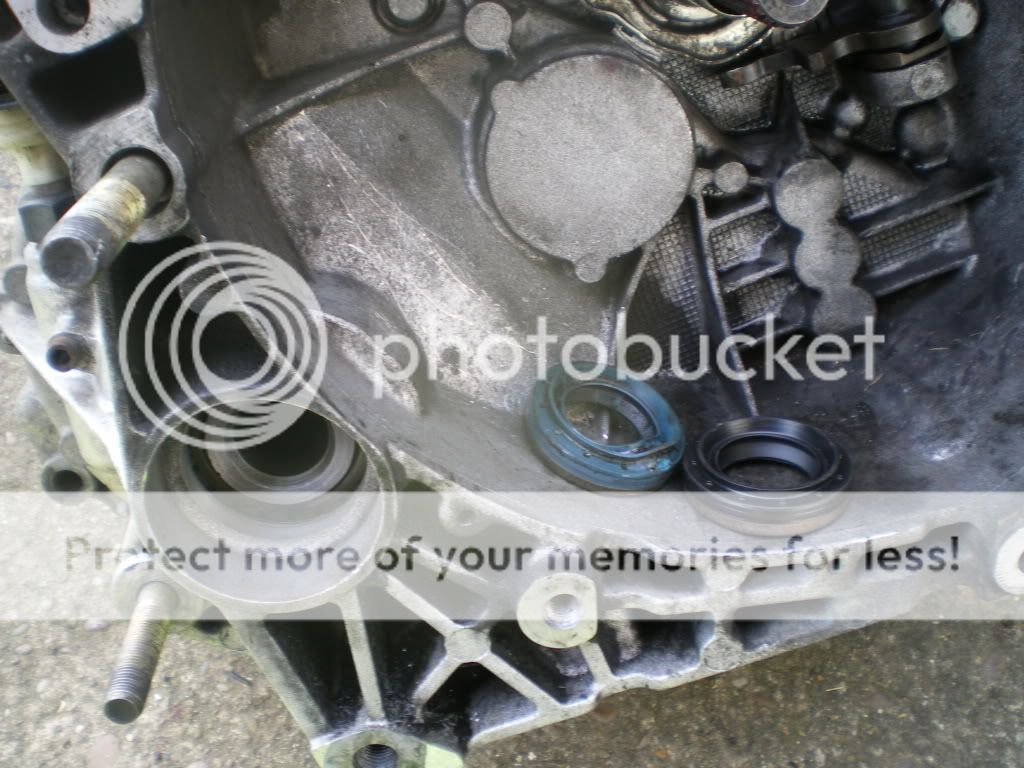
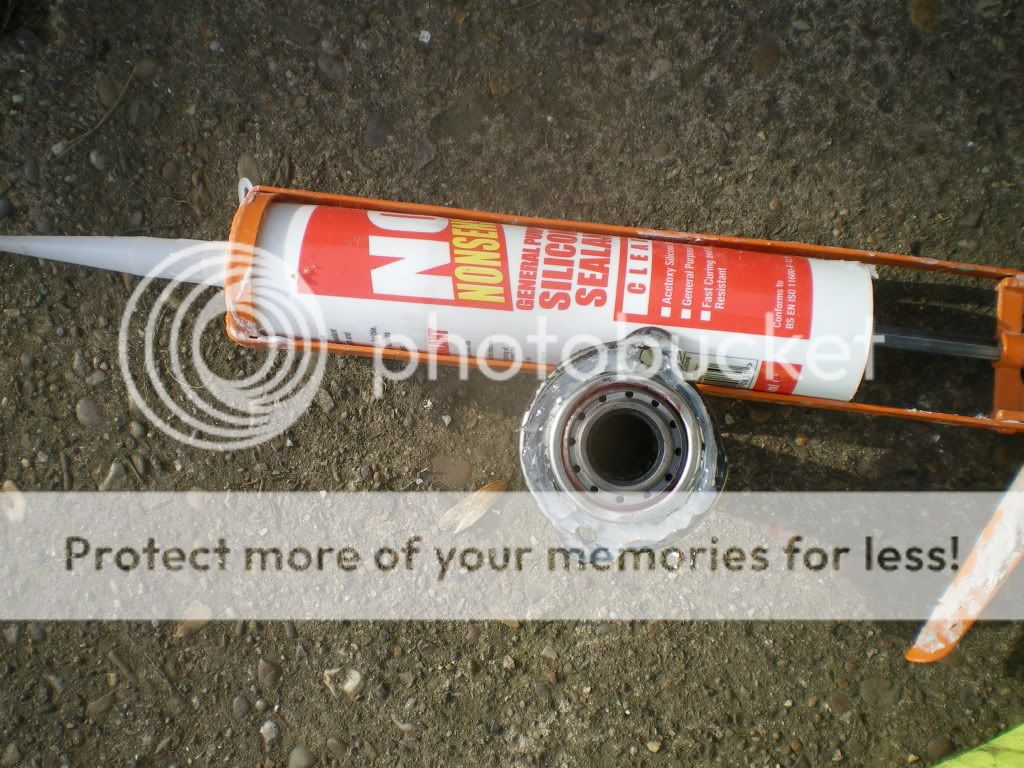
Tap new seal in with right size socket and rubber malet,coat lightly in gearbox oil if dry.
Now you are ready to put gearbox back,make sure the release bearing is pushed all the way down the bearing holder towards gearbox.It will only go all the way down one way,cone part facing towards clutch.
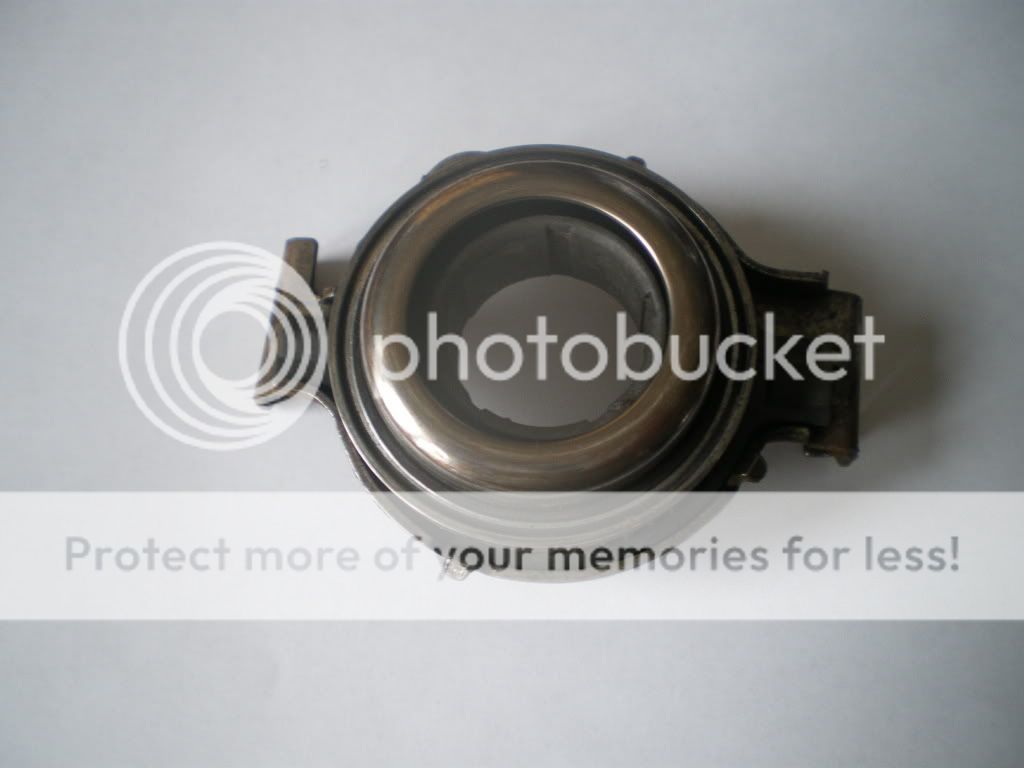
Pretty sure the extra arm goes to the bottom
Just before you get to the stage of fitting box fully,shine a tourch in to make sure release bearing has not fell away.You have to shake it a lot or not put it on proper for that to happen.
Then its just putting it all back together again,i spent time cleaning my gearbox and all nuts and bolts,and greased them well.Lay the subframe on a trolly jack and jack it up to re-fit,if you have 2 trolly jacks spare all the better,one each side,i just used one in the middle.
Just a couple of photos which went wrong,lack of sleep doing this thread for 3rd time too.
Picture of gearbox front mount
Picture of which way the clutch plate must face out towards gearbox
good day I have a fiat multipla and the suport of it got broken I am interesting in the gear box engine rear suport